Project Management
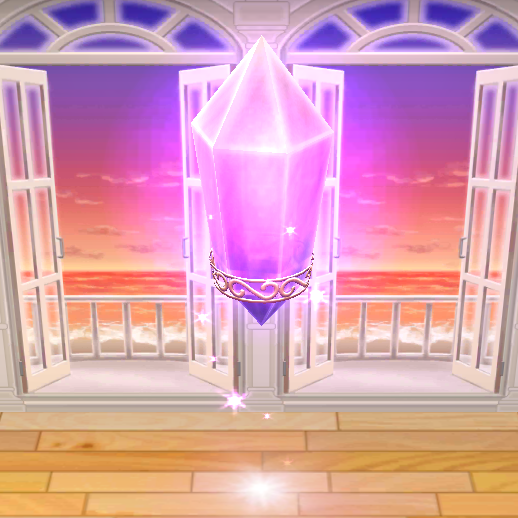
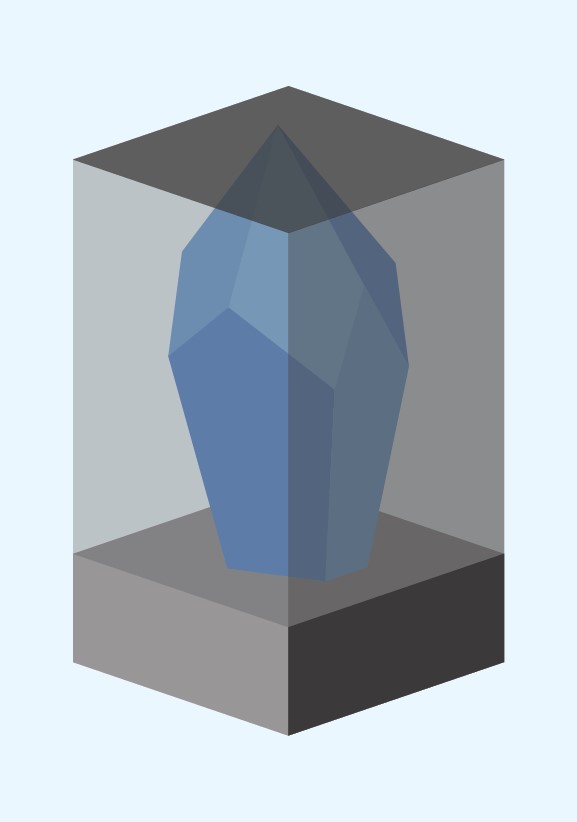
For final project, I decided to make a mood lamp. It is simple and is suitable for me as I am a beginner, totally new when it comes to arduino programming.I played Animal Crossing Pocket Camp, the mobile version. The crystal furniture inspired me to make the shape of the mood lamp into a crystal.
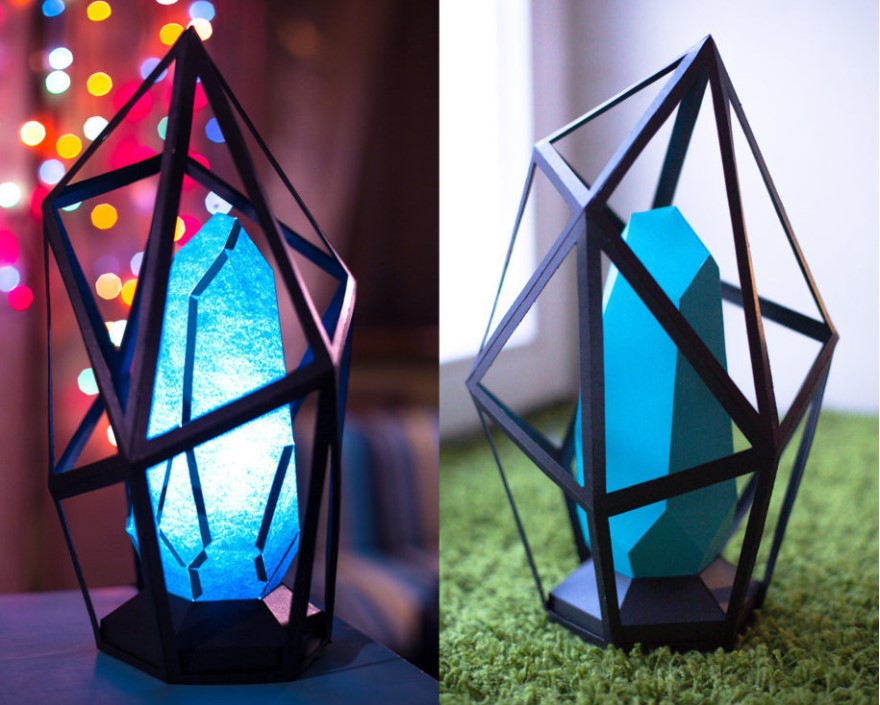
Searching through for mood lamp examples on Google, I stumbled upon someone who made a diamond mood lamp which was interesting to me.
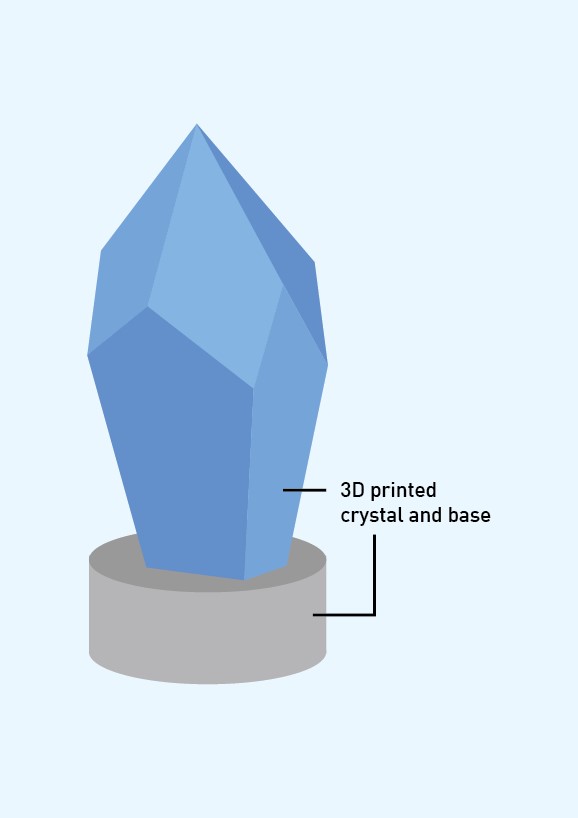
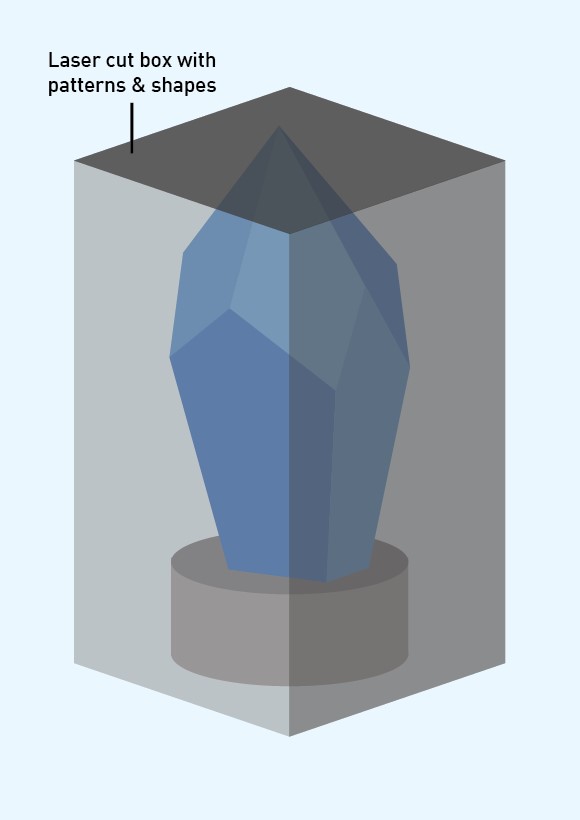
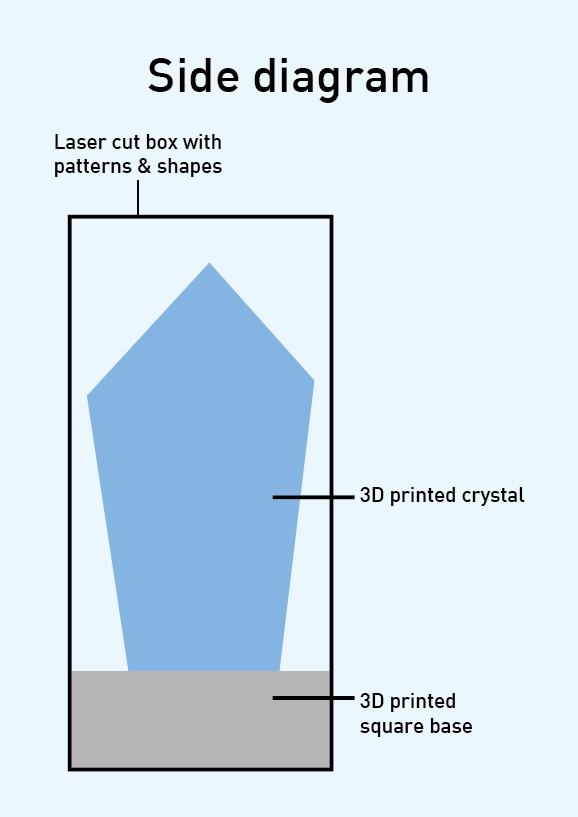
Thus, I came up with a simple sketch of the crystal mood lamp I have in mind. The crystal and base will be 3D printed. The box that surrounds it will be laser cutted with shapes and patterns.
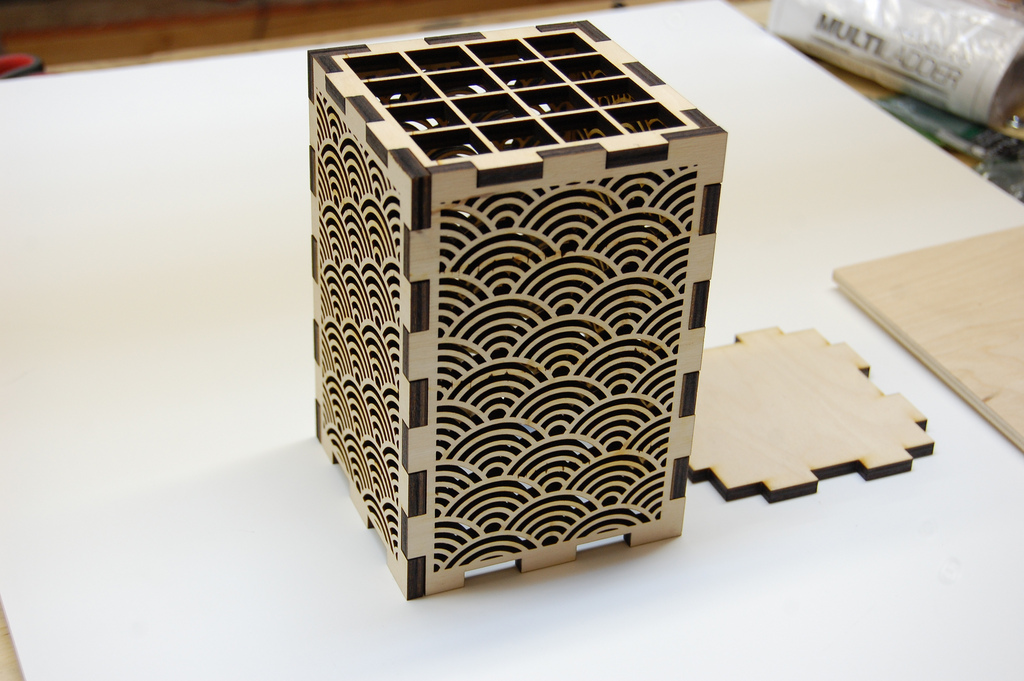
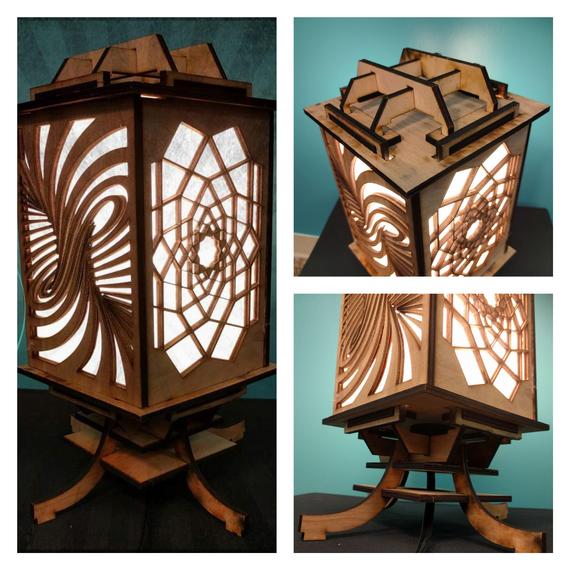
Below are some laser cutted mood lamp references:
After consulting Mr Chew, I got some feedback on the mood lamp. Since I am going to enclose the lamp within the box, the base of the lamp should be a square. This way it won't move around inside.
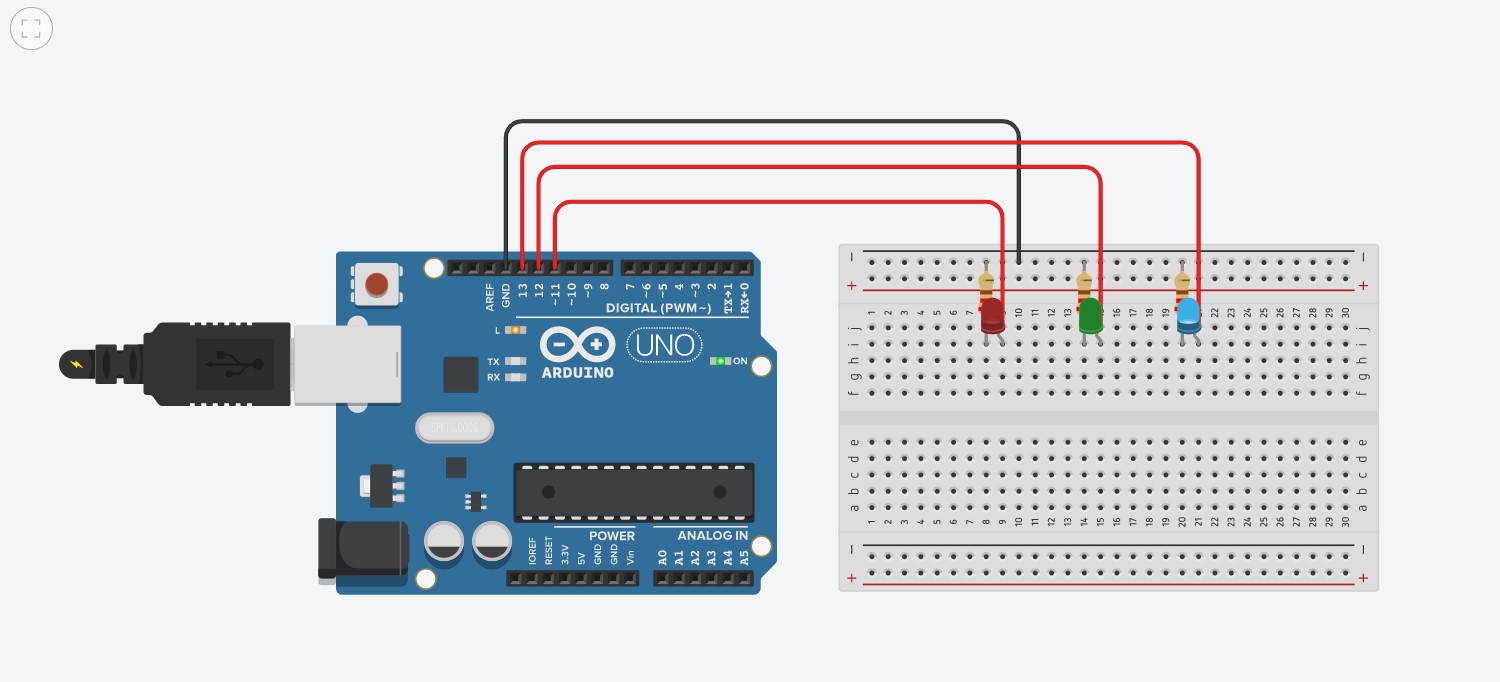
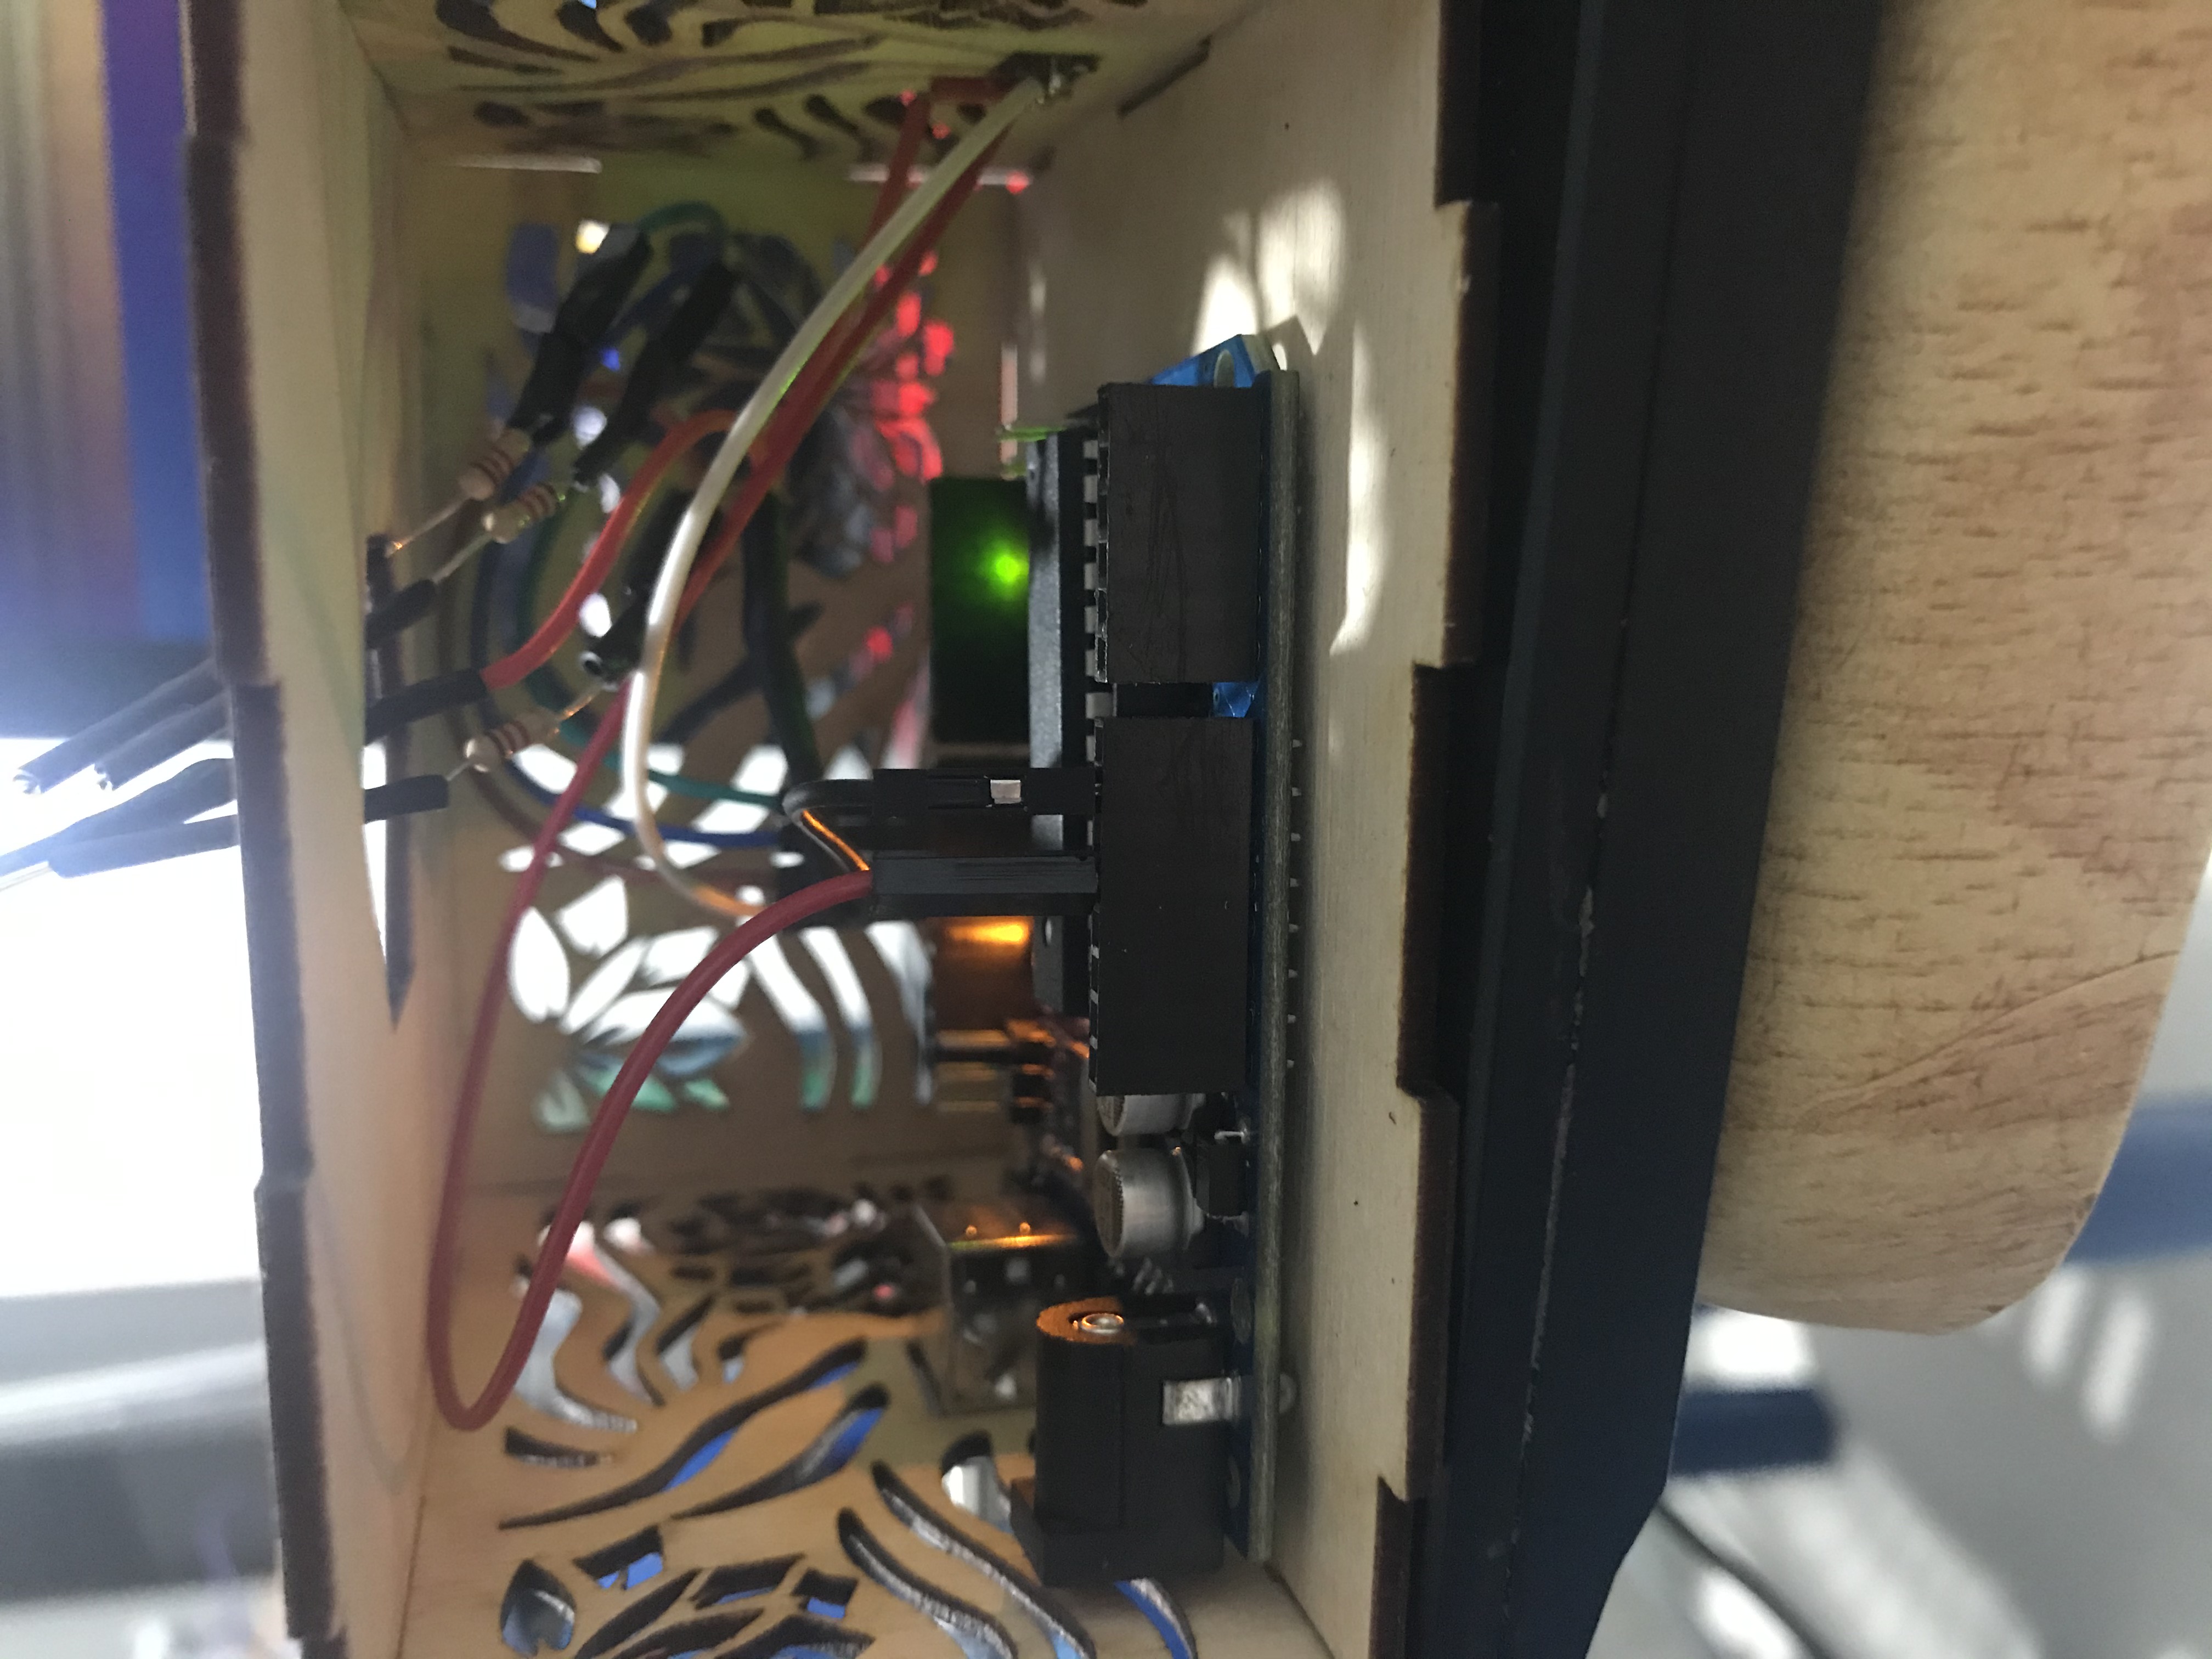
The RGB light is an output so all I need now is an input which can be the off/switch button.
I watched and followed a LED light tutorial on Youtube.
Bill of Materials
- x1 Arduino UNO (kit)
- Slide switch
- x7 male to male jumper wires(kit)
- x3 resistors
- x1 Plywood, 3mm thickness
- RGB led (kit)
Changing the model
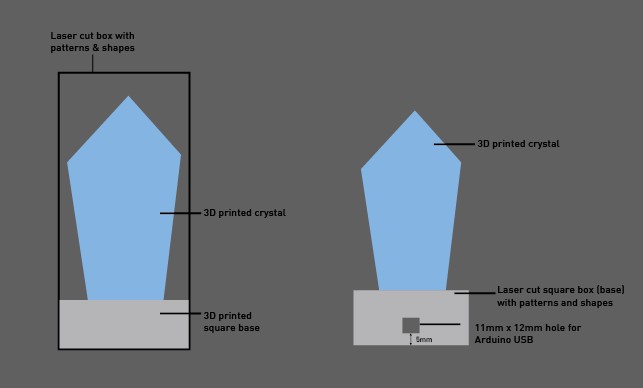
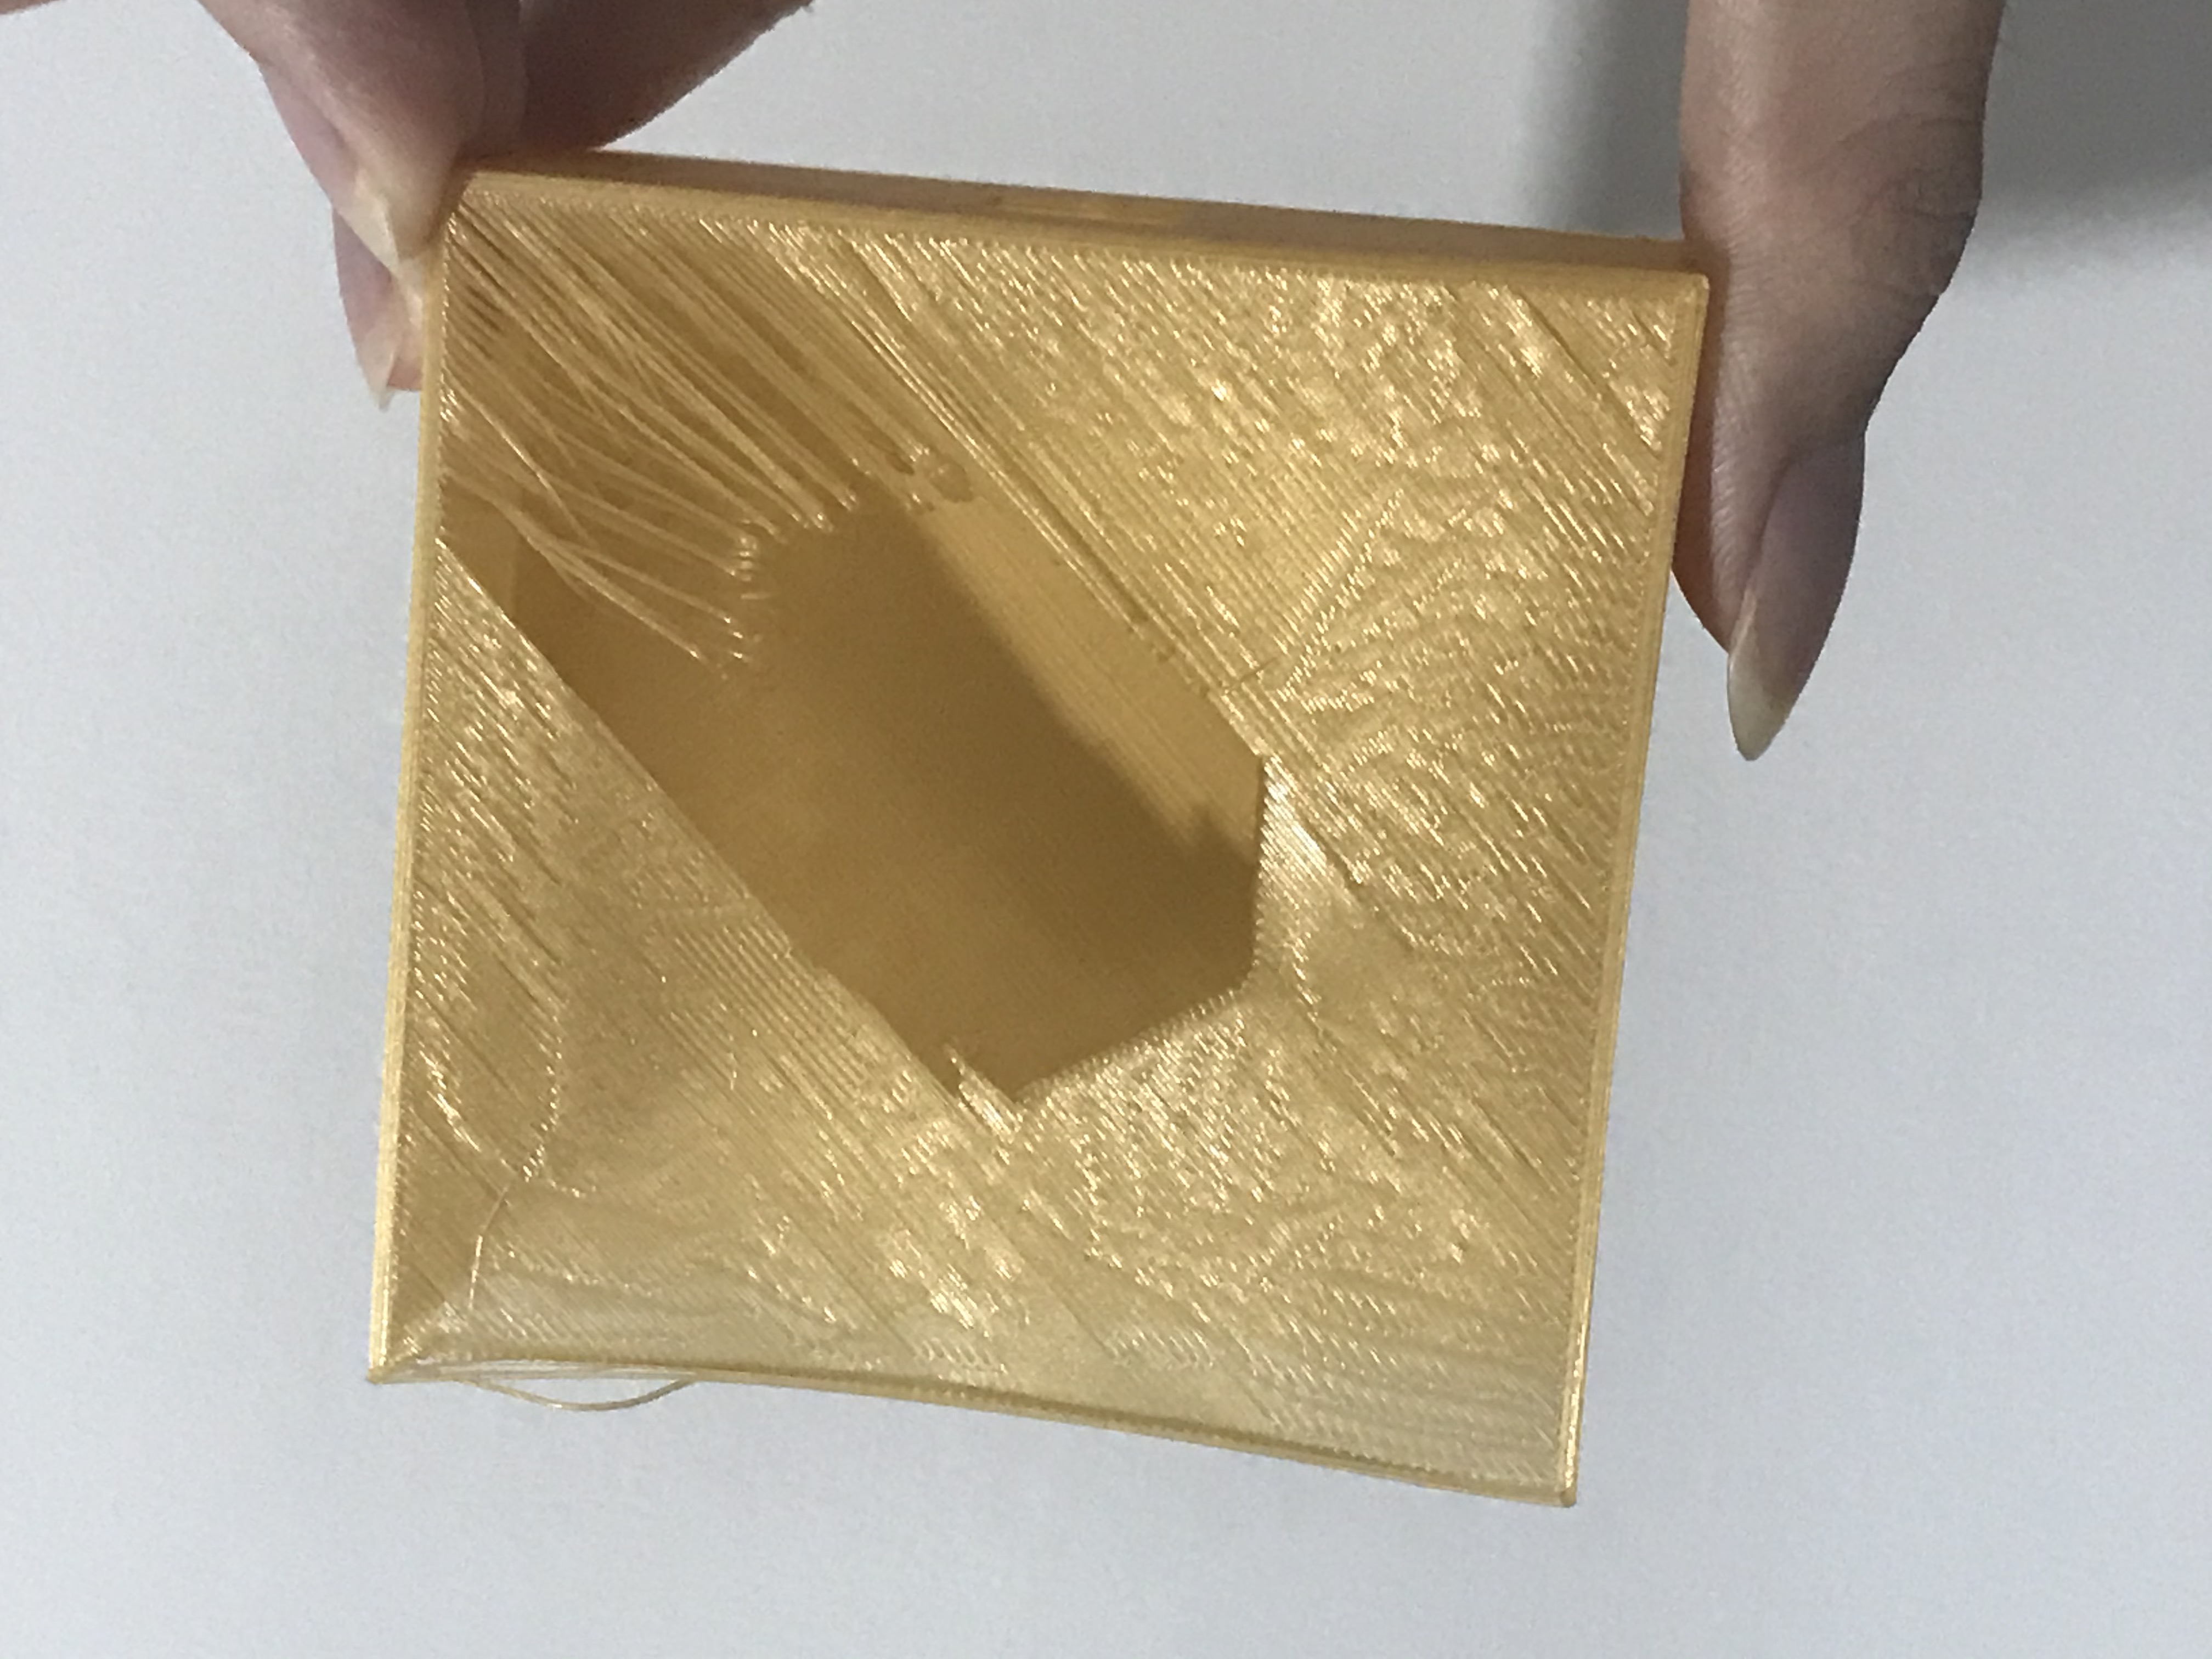
Originally I wanted to 3D print the crystal with base but then I realised that its not really feasible. It takes more than 3 hour to print. It failed and the base is not tall enough to fit the Arduino. So I changed the model, I also threw away the idea of the outer box having shapes and patterns. Now, the base will be laser cut while the crystal remains 3D print.
Laser cut box
After going through multiple designs and patterns, I settled for the last design.

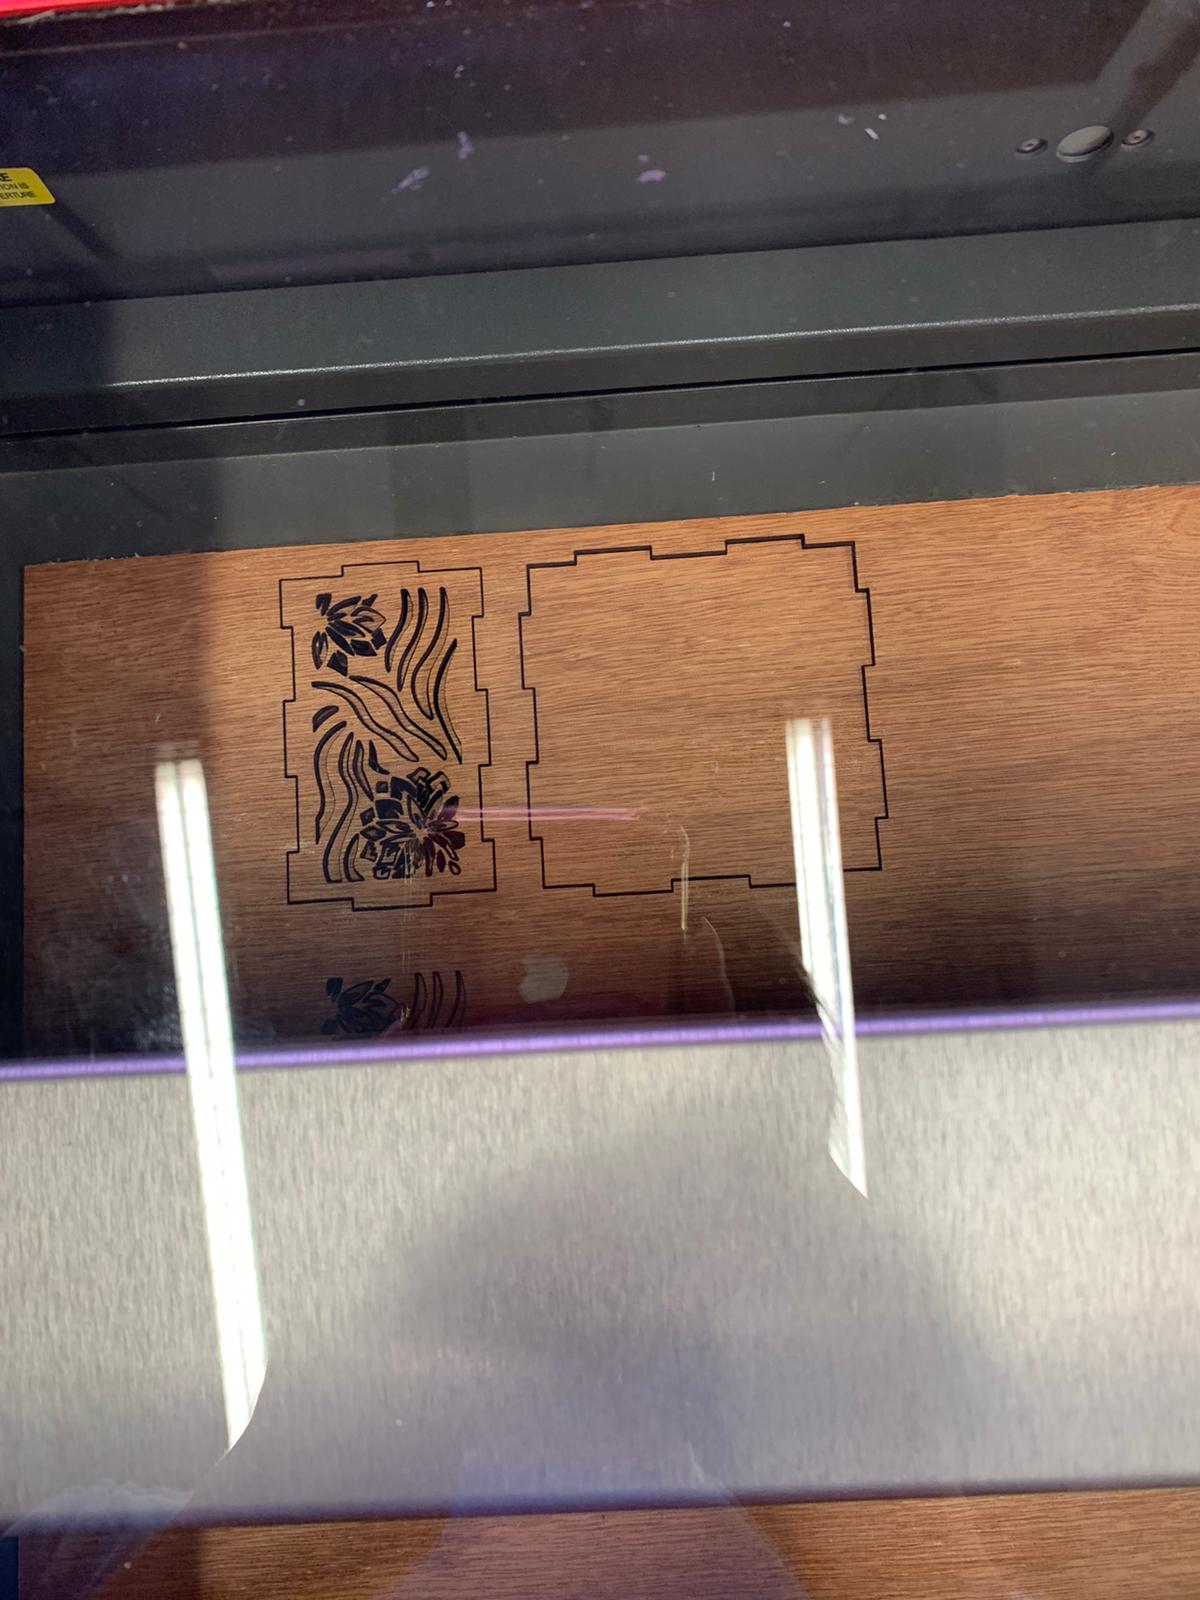
Finalised design for the laser cut box. I measured and added holes for the Arduino USB, slide switch and LED light to go into the crystal.
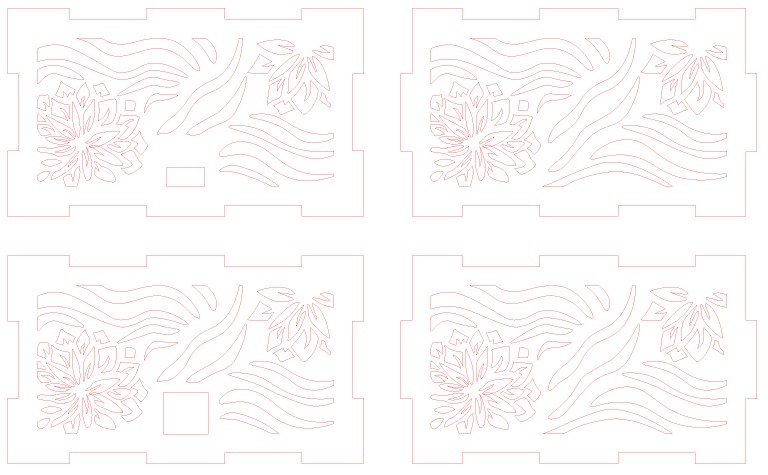

Real_crystal_final.ai
Real_crystal_final.dxf
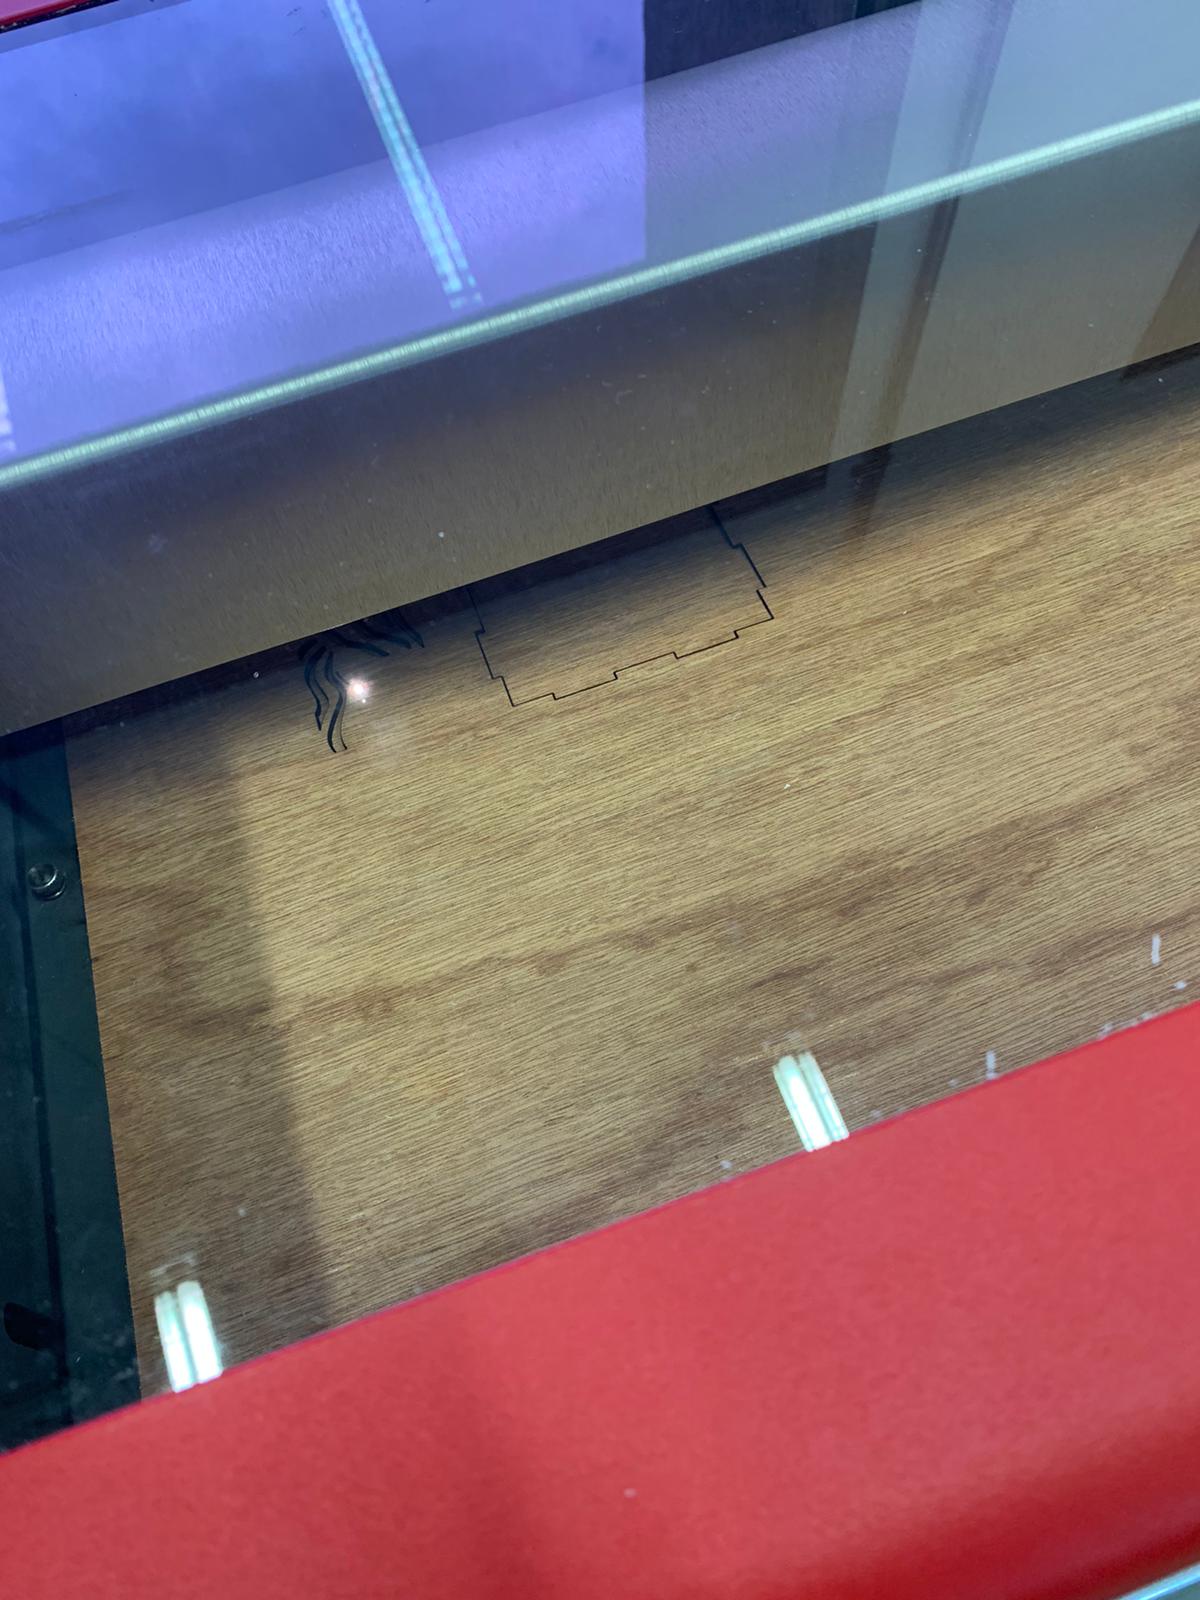
Laser Cut Result
The hole for the slide switch is not the right fit so I had to file the hole to make it bigger. Otherwise the laser cut went smoothly.


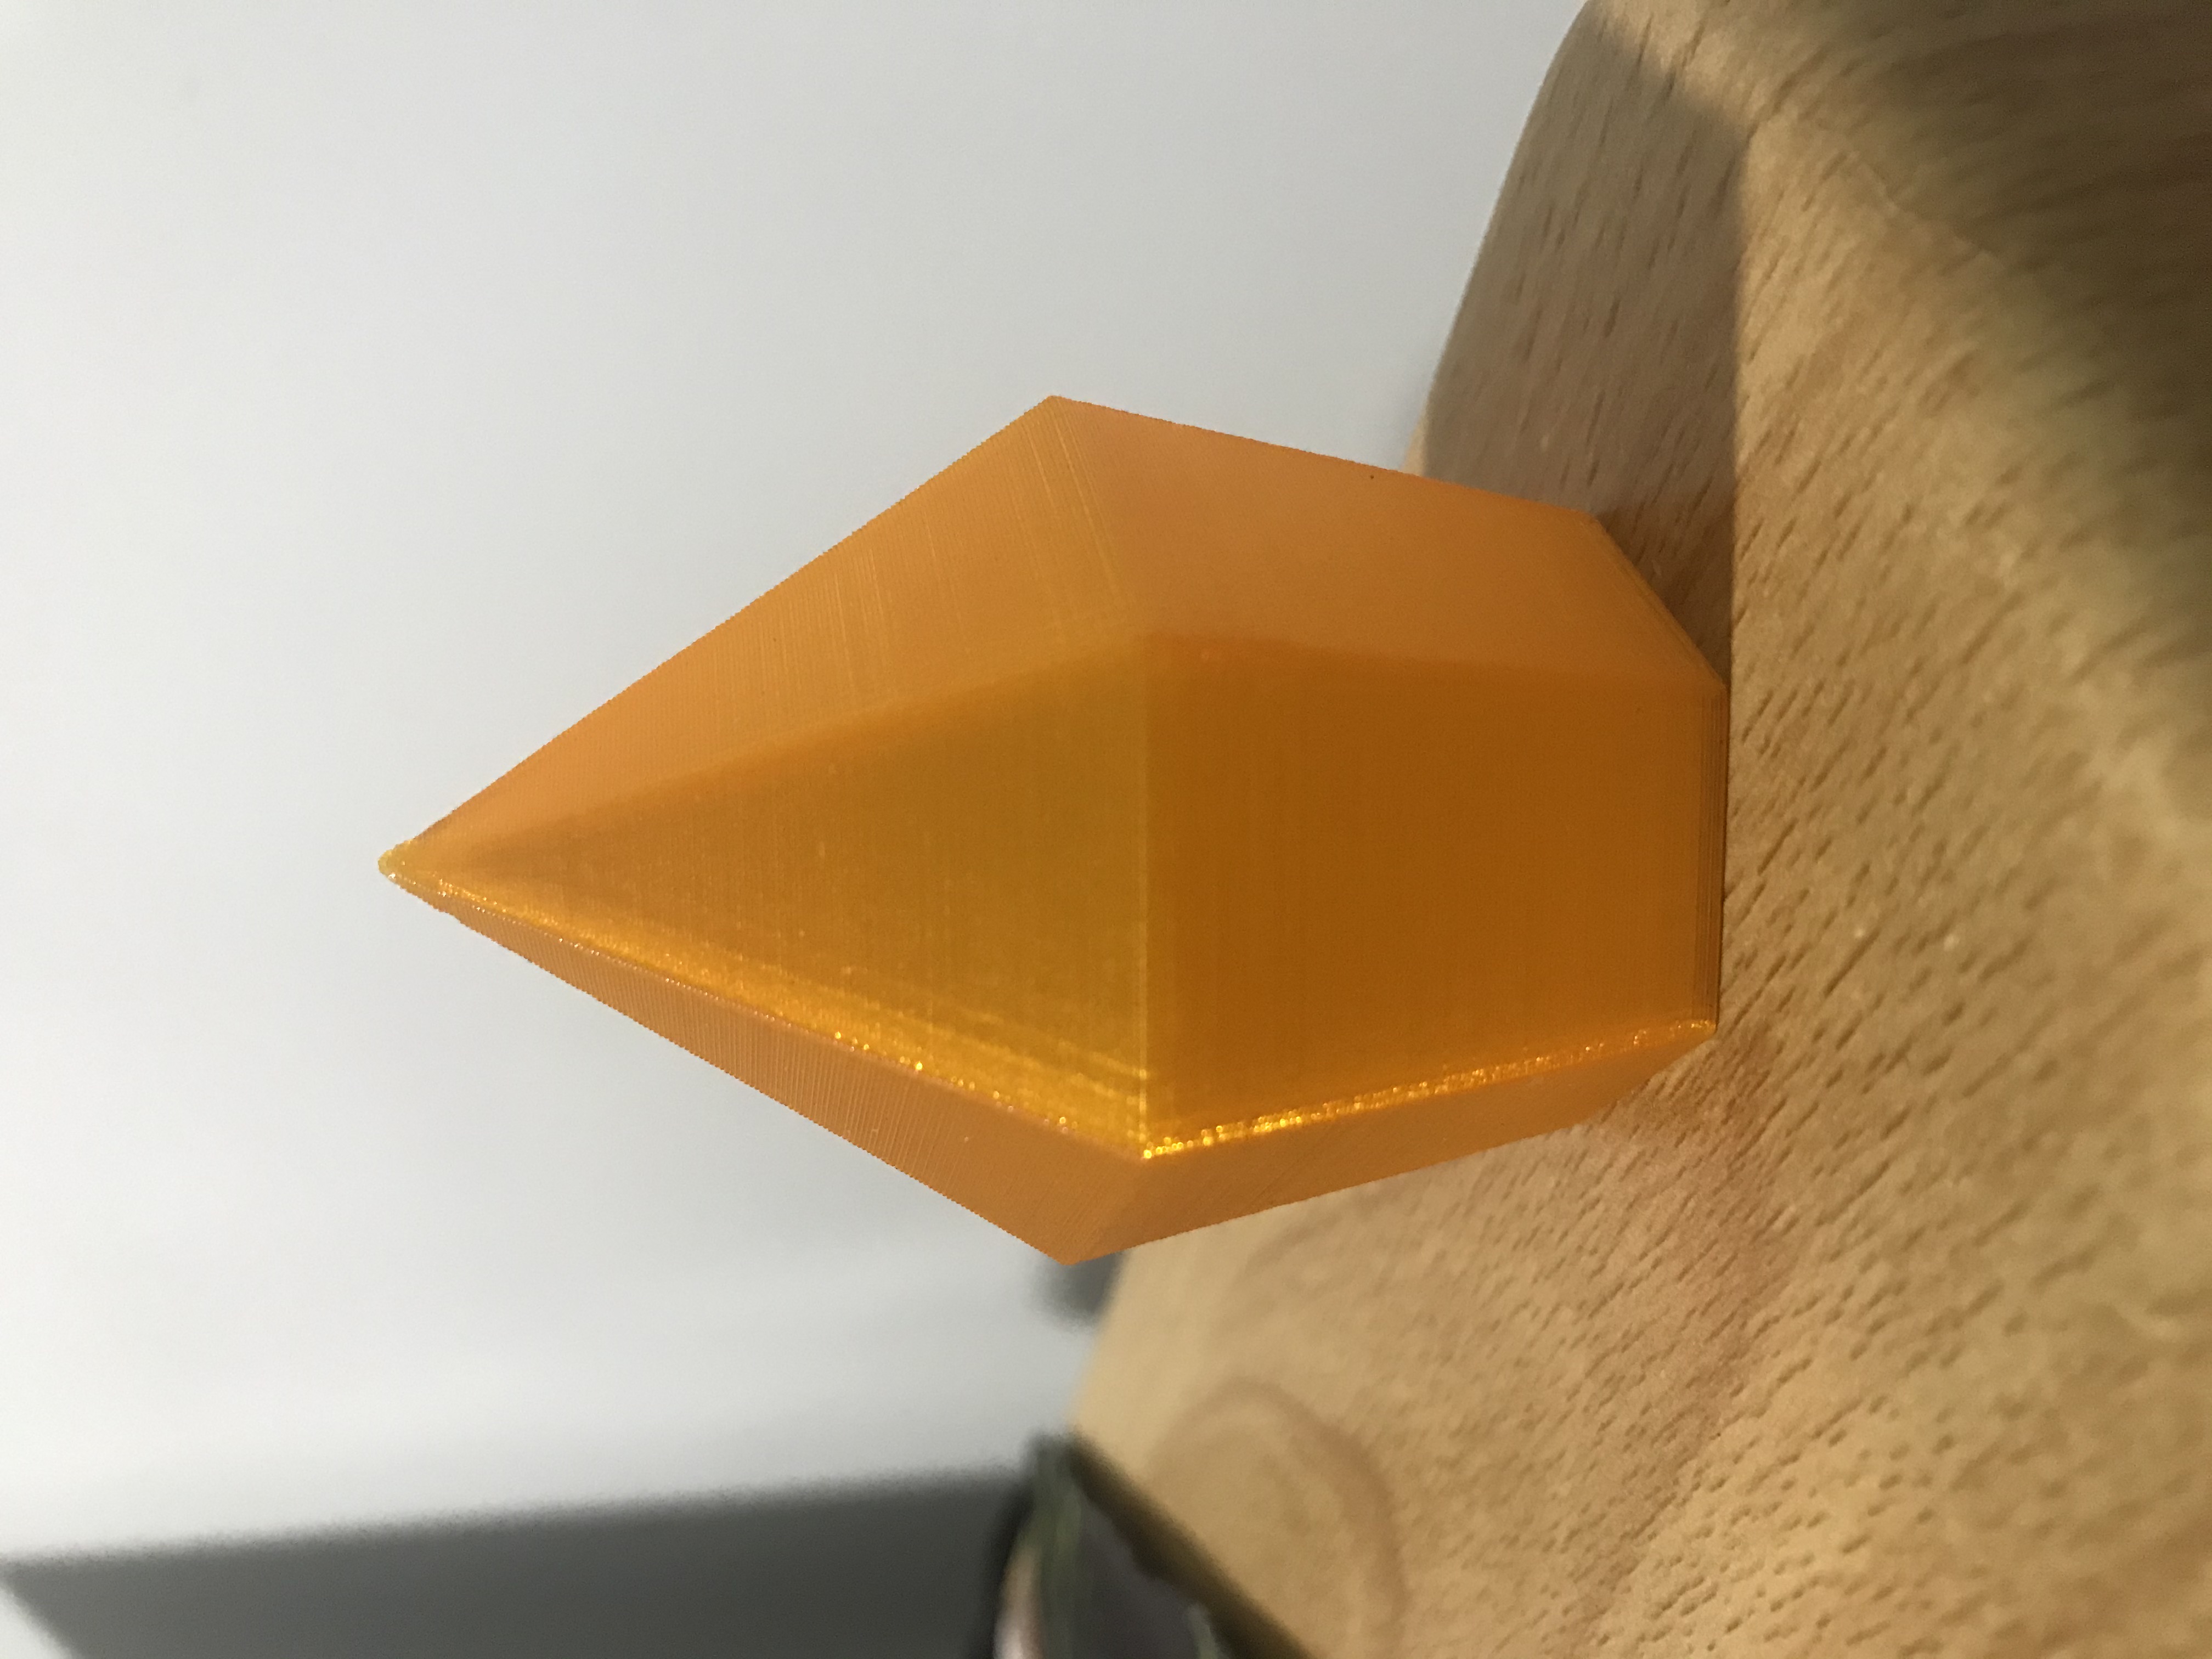
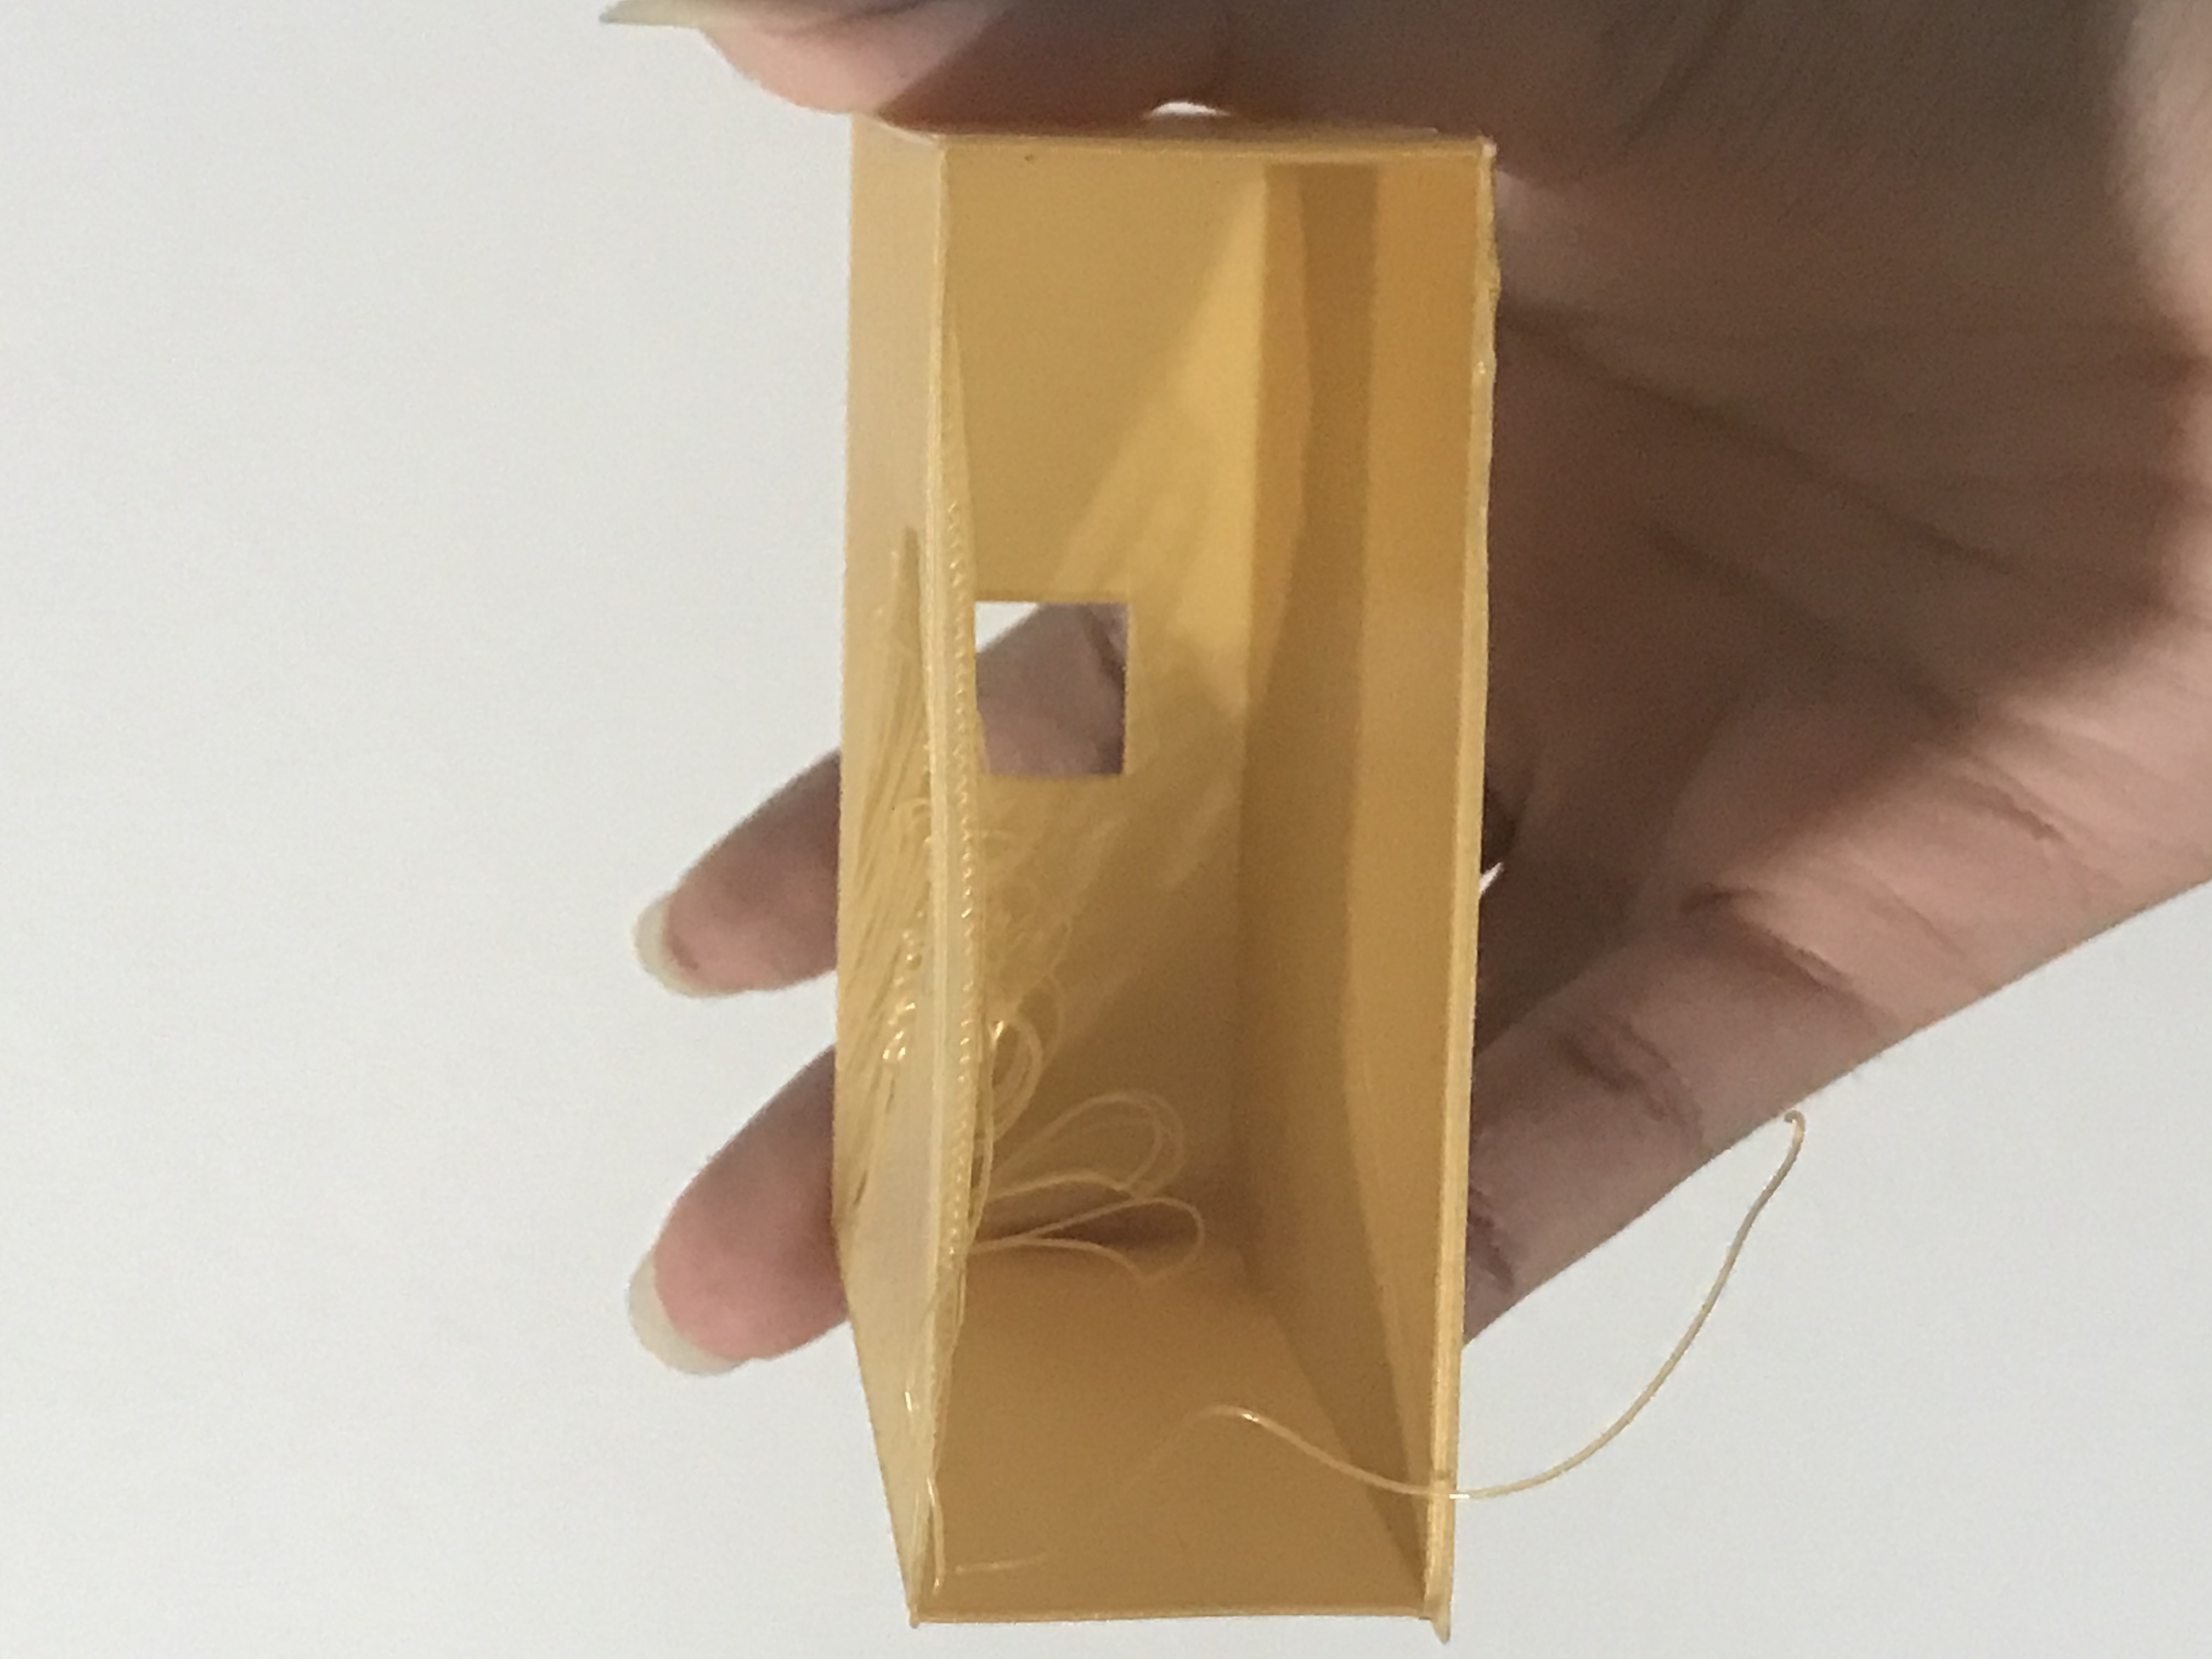
3D print crystal
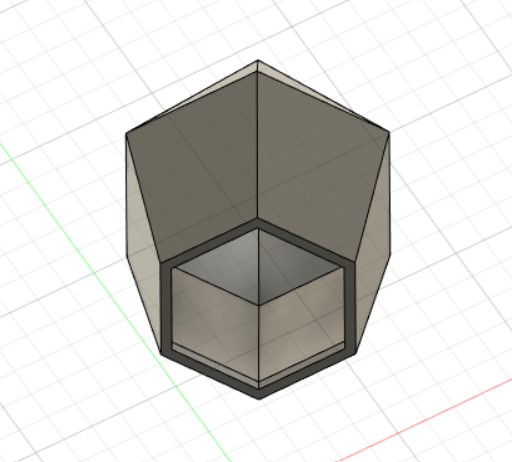
Even though the base is laser cut, I included it in the 3D print model for added accuracy. I sketched the polygon and extruded it. The base of the crystal base height is 30mm with 10 angle. Top crystal height is 40mm with 30 angle.
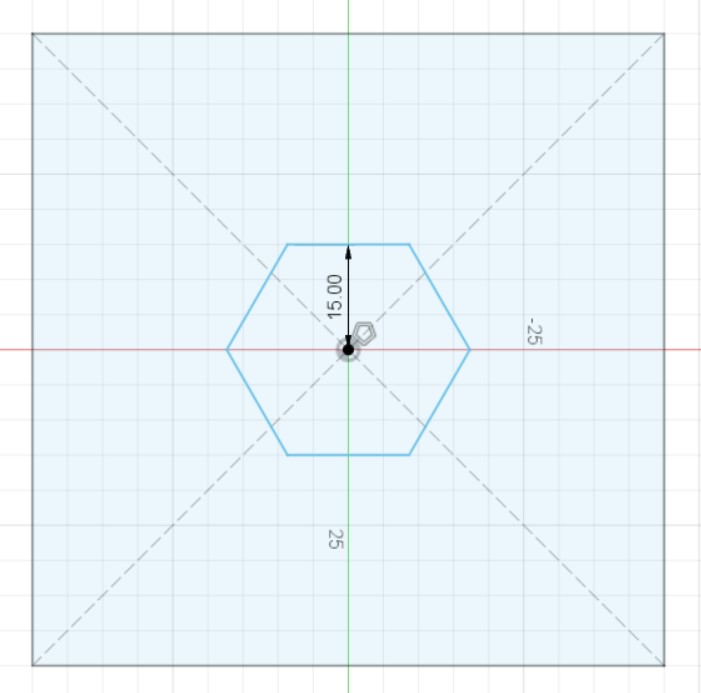
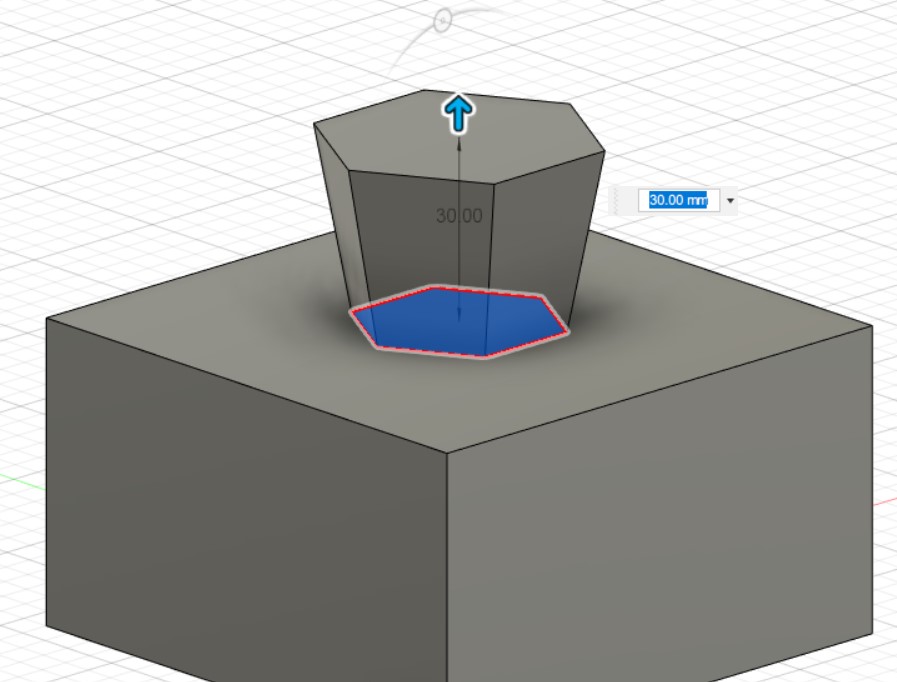

The crystal is hollowed out as well.
Crystal_final.stl
3D Print Result
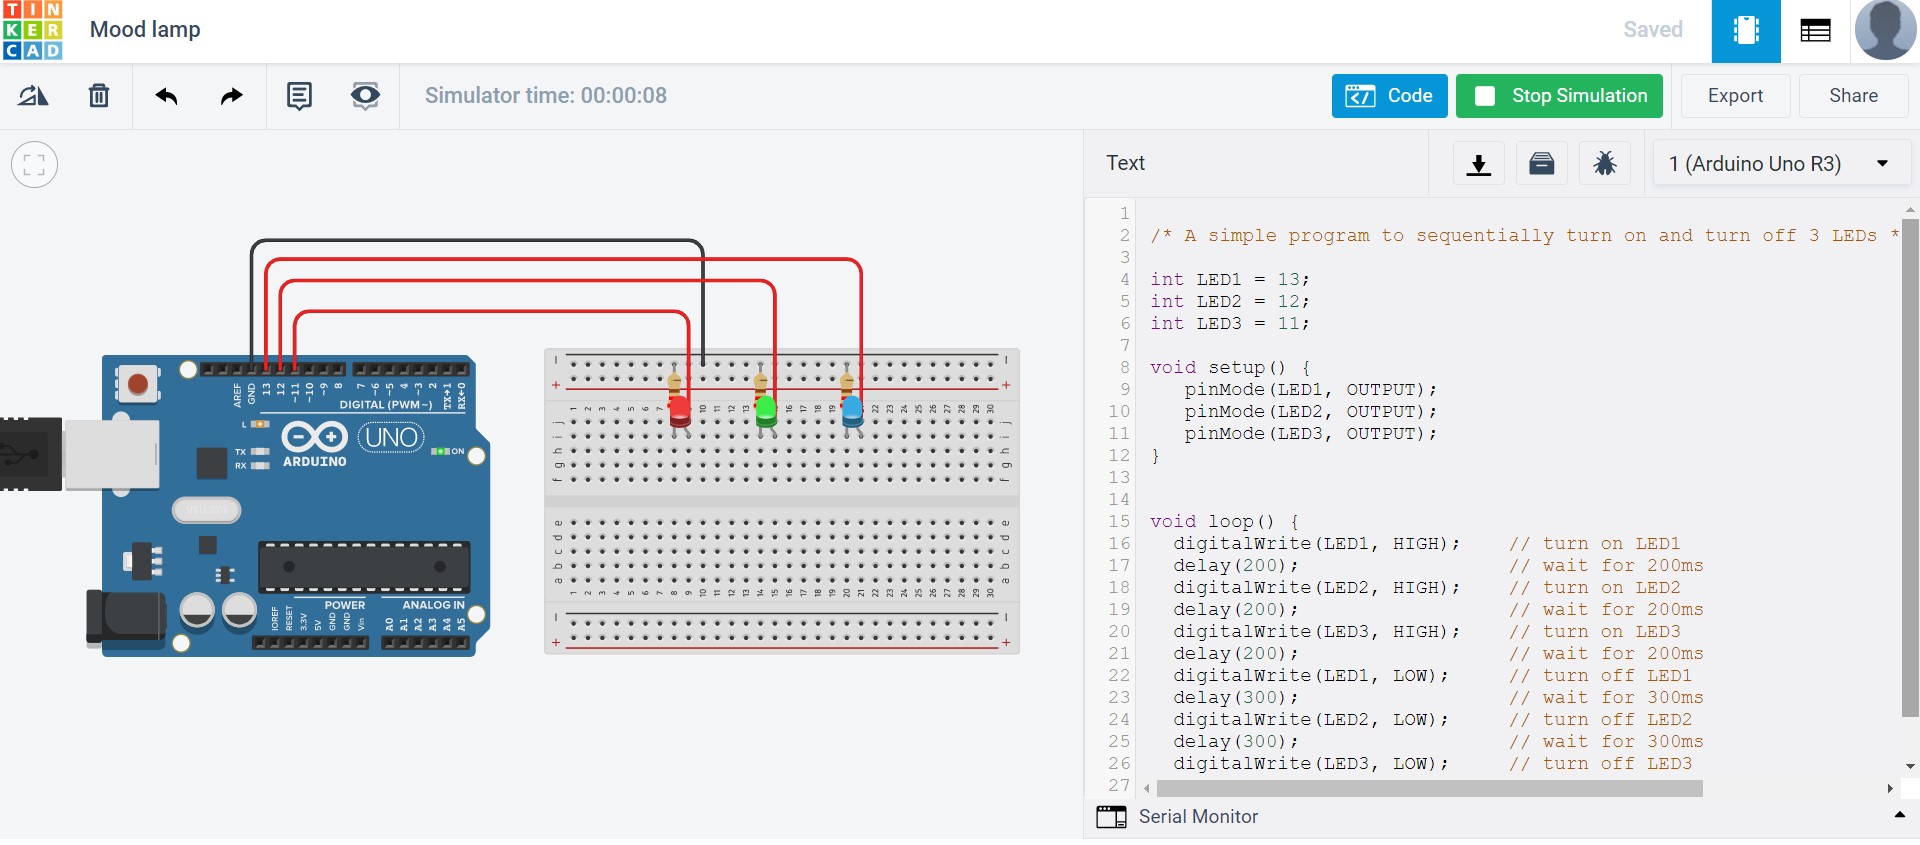
Coding Arduino
I'm not very familiar with coding and wiring so I tried to test out different codes and wiring that I managed to find online from Google to Youtube.
At first I tested out the LED lights instead of RGB light.
Slowly I added pushbutton in and most of the tutorial online just show how to turn LED on by pressing the pushbutton. If released, it will go off. This is not what I wanted. So I went on searching how to toggle LED, which is the on and off state and this is what I needed.
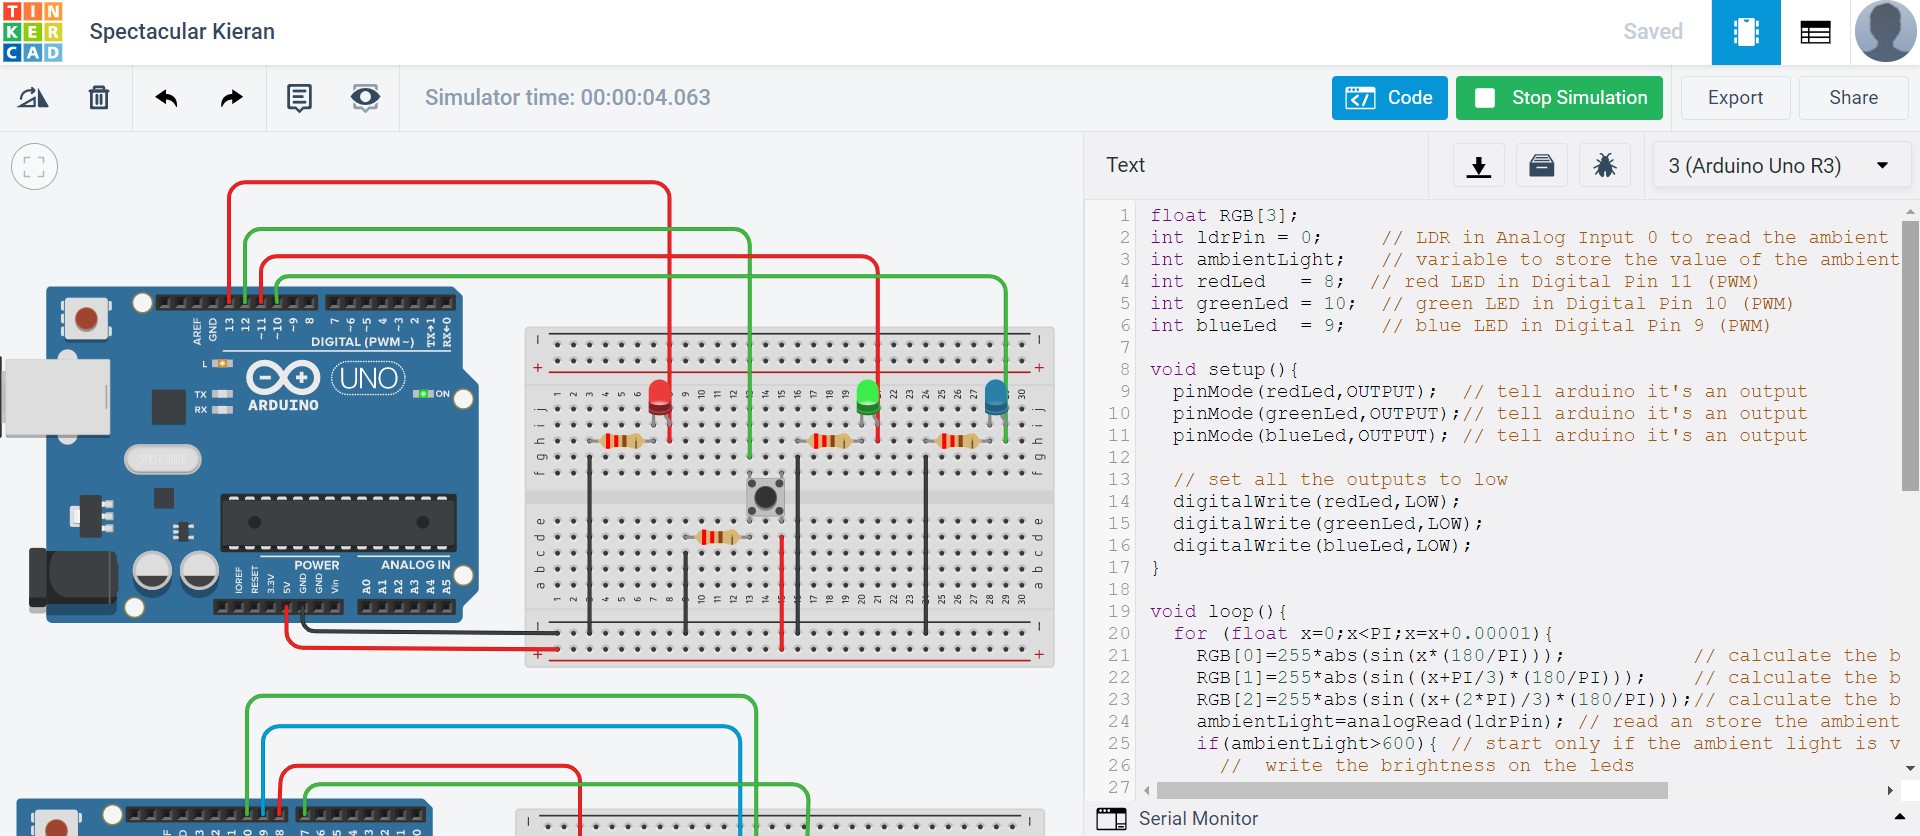
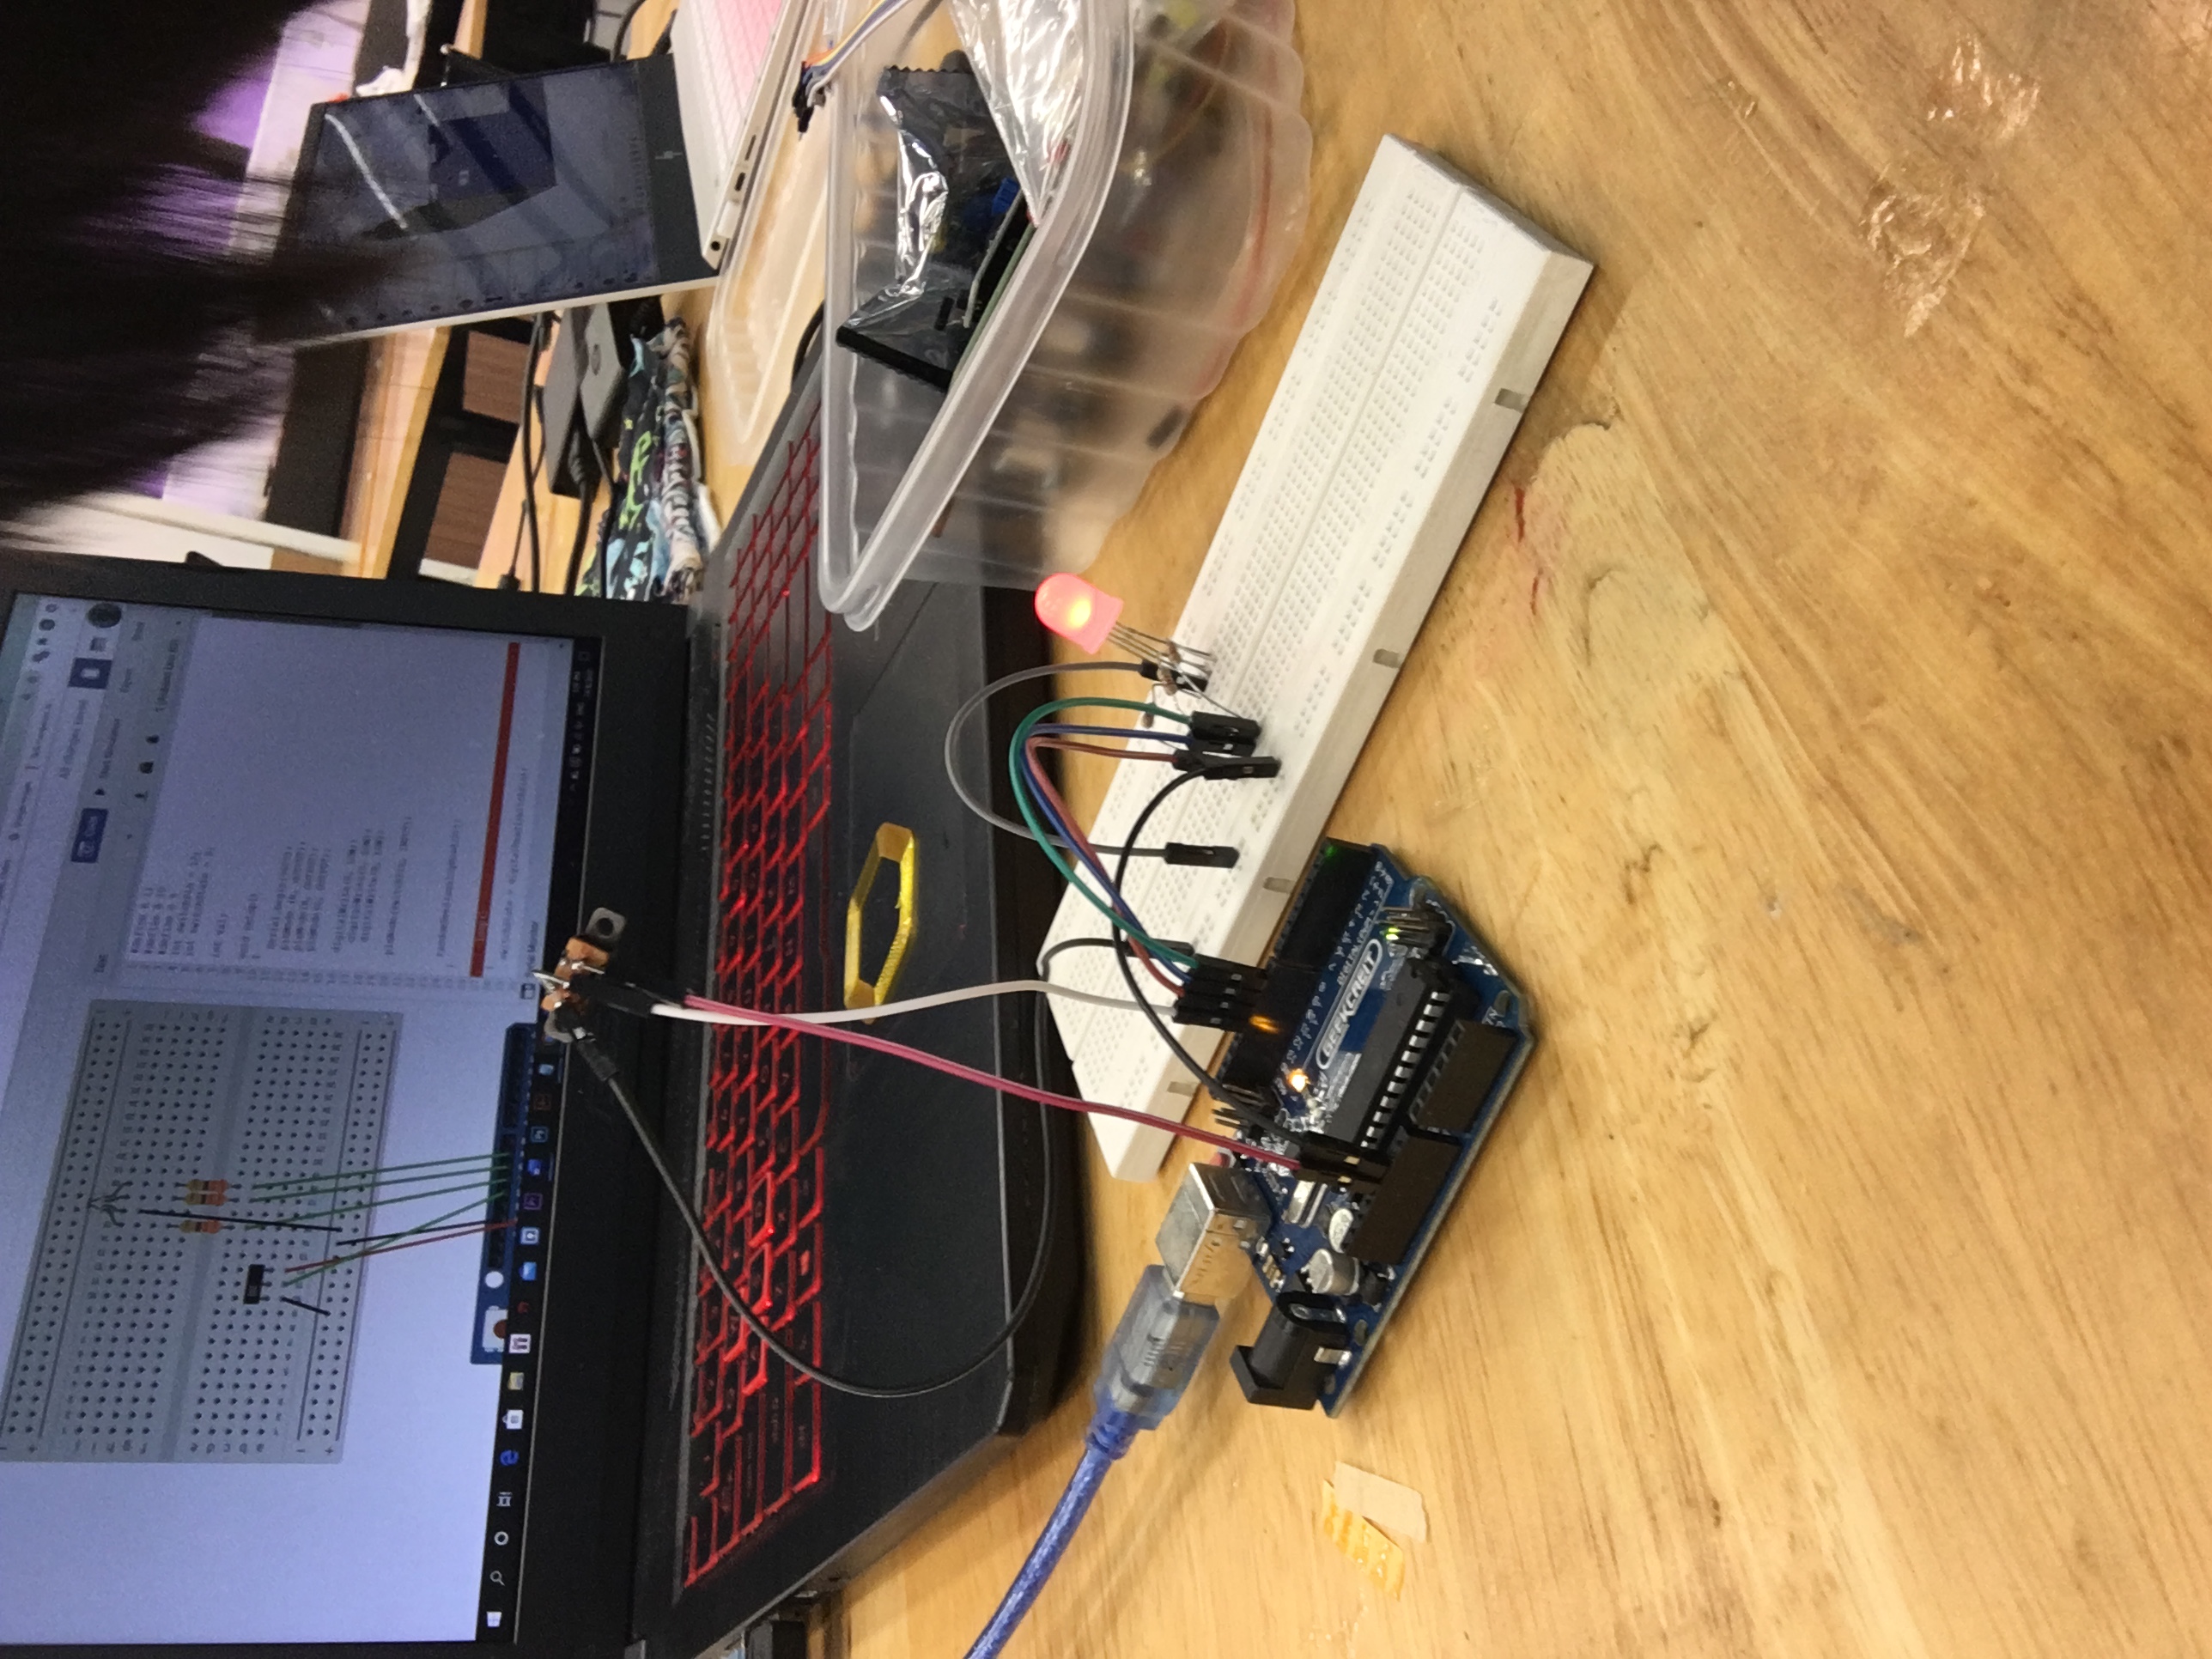
Next, I moved on to using slide switch and with RGB lights. However, with this current code, when I off the RBG light it can only turn off after the whole colour set is finished. When I tried it with Arduino IDE, I was able to off the light immediately.
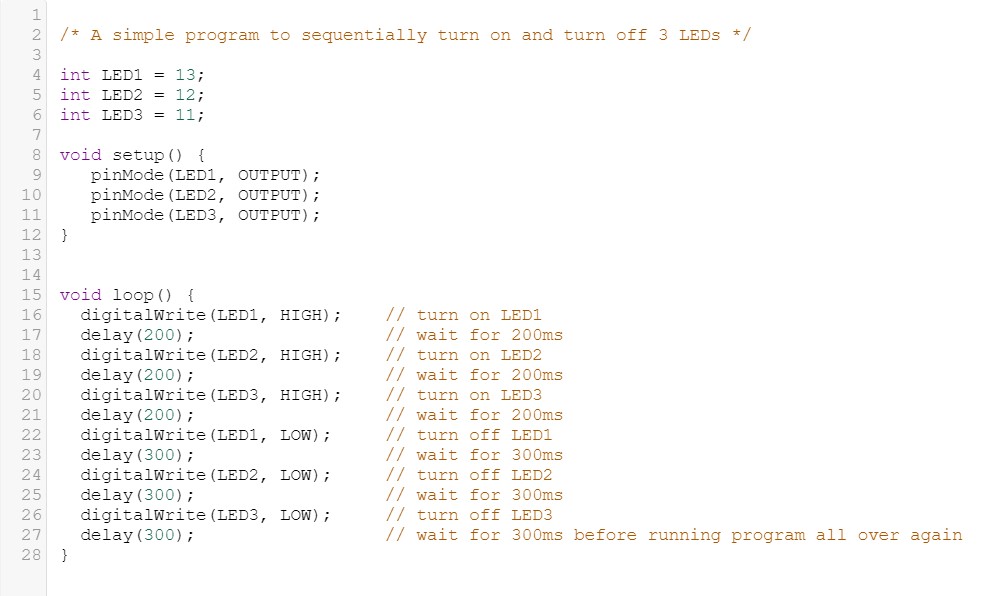
LED mood lamp code.ino

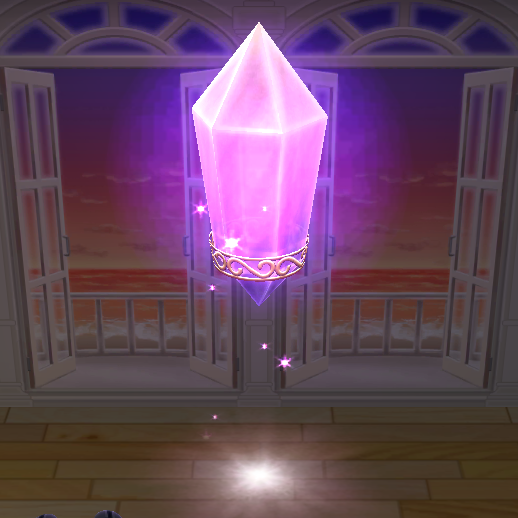
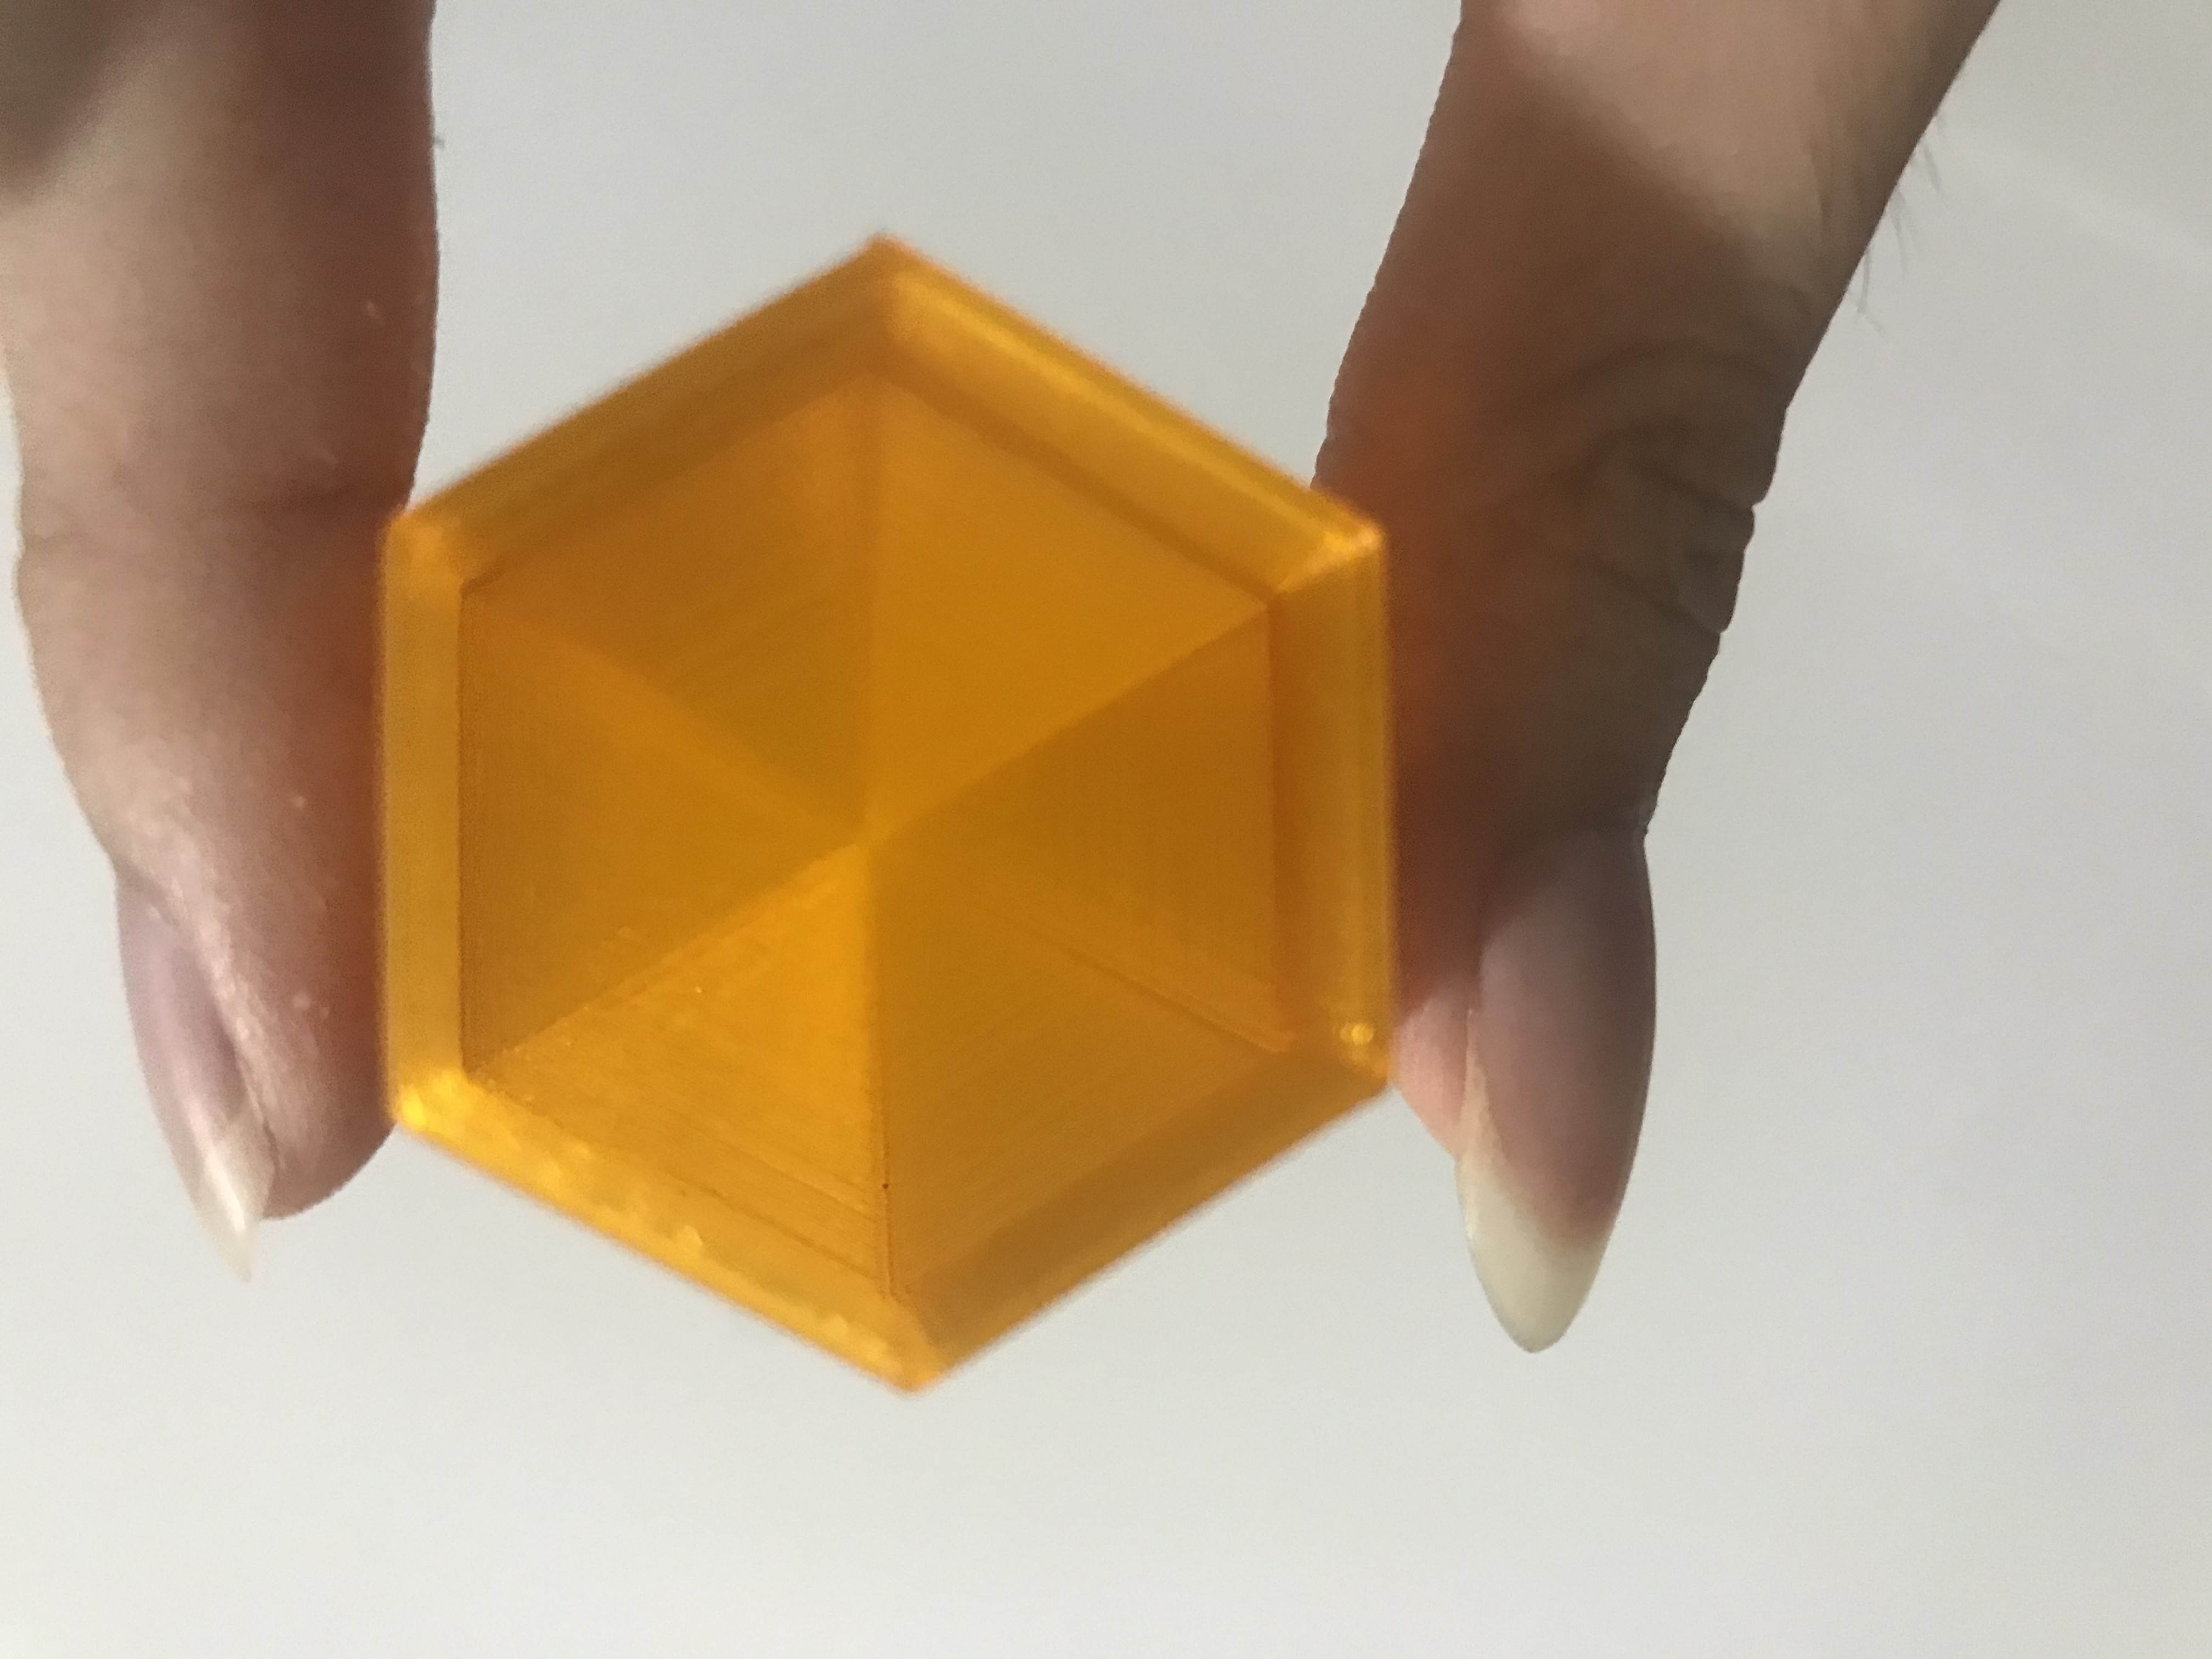
Testing out RGB Light
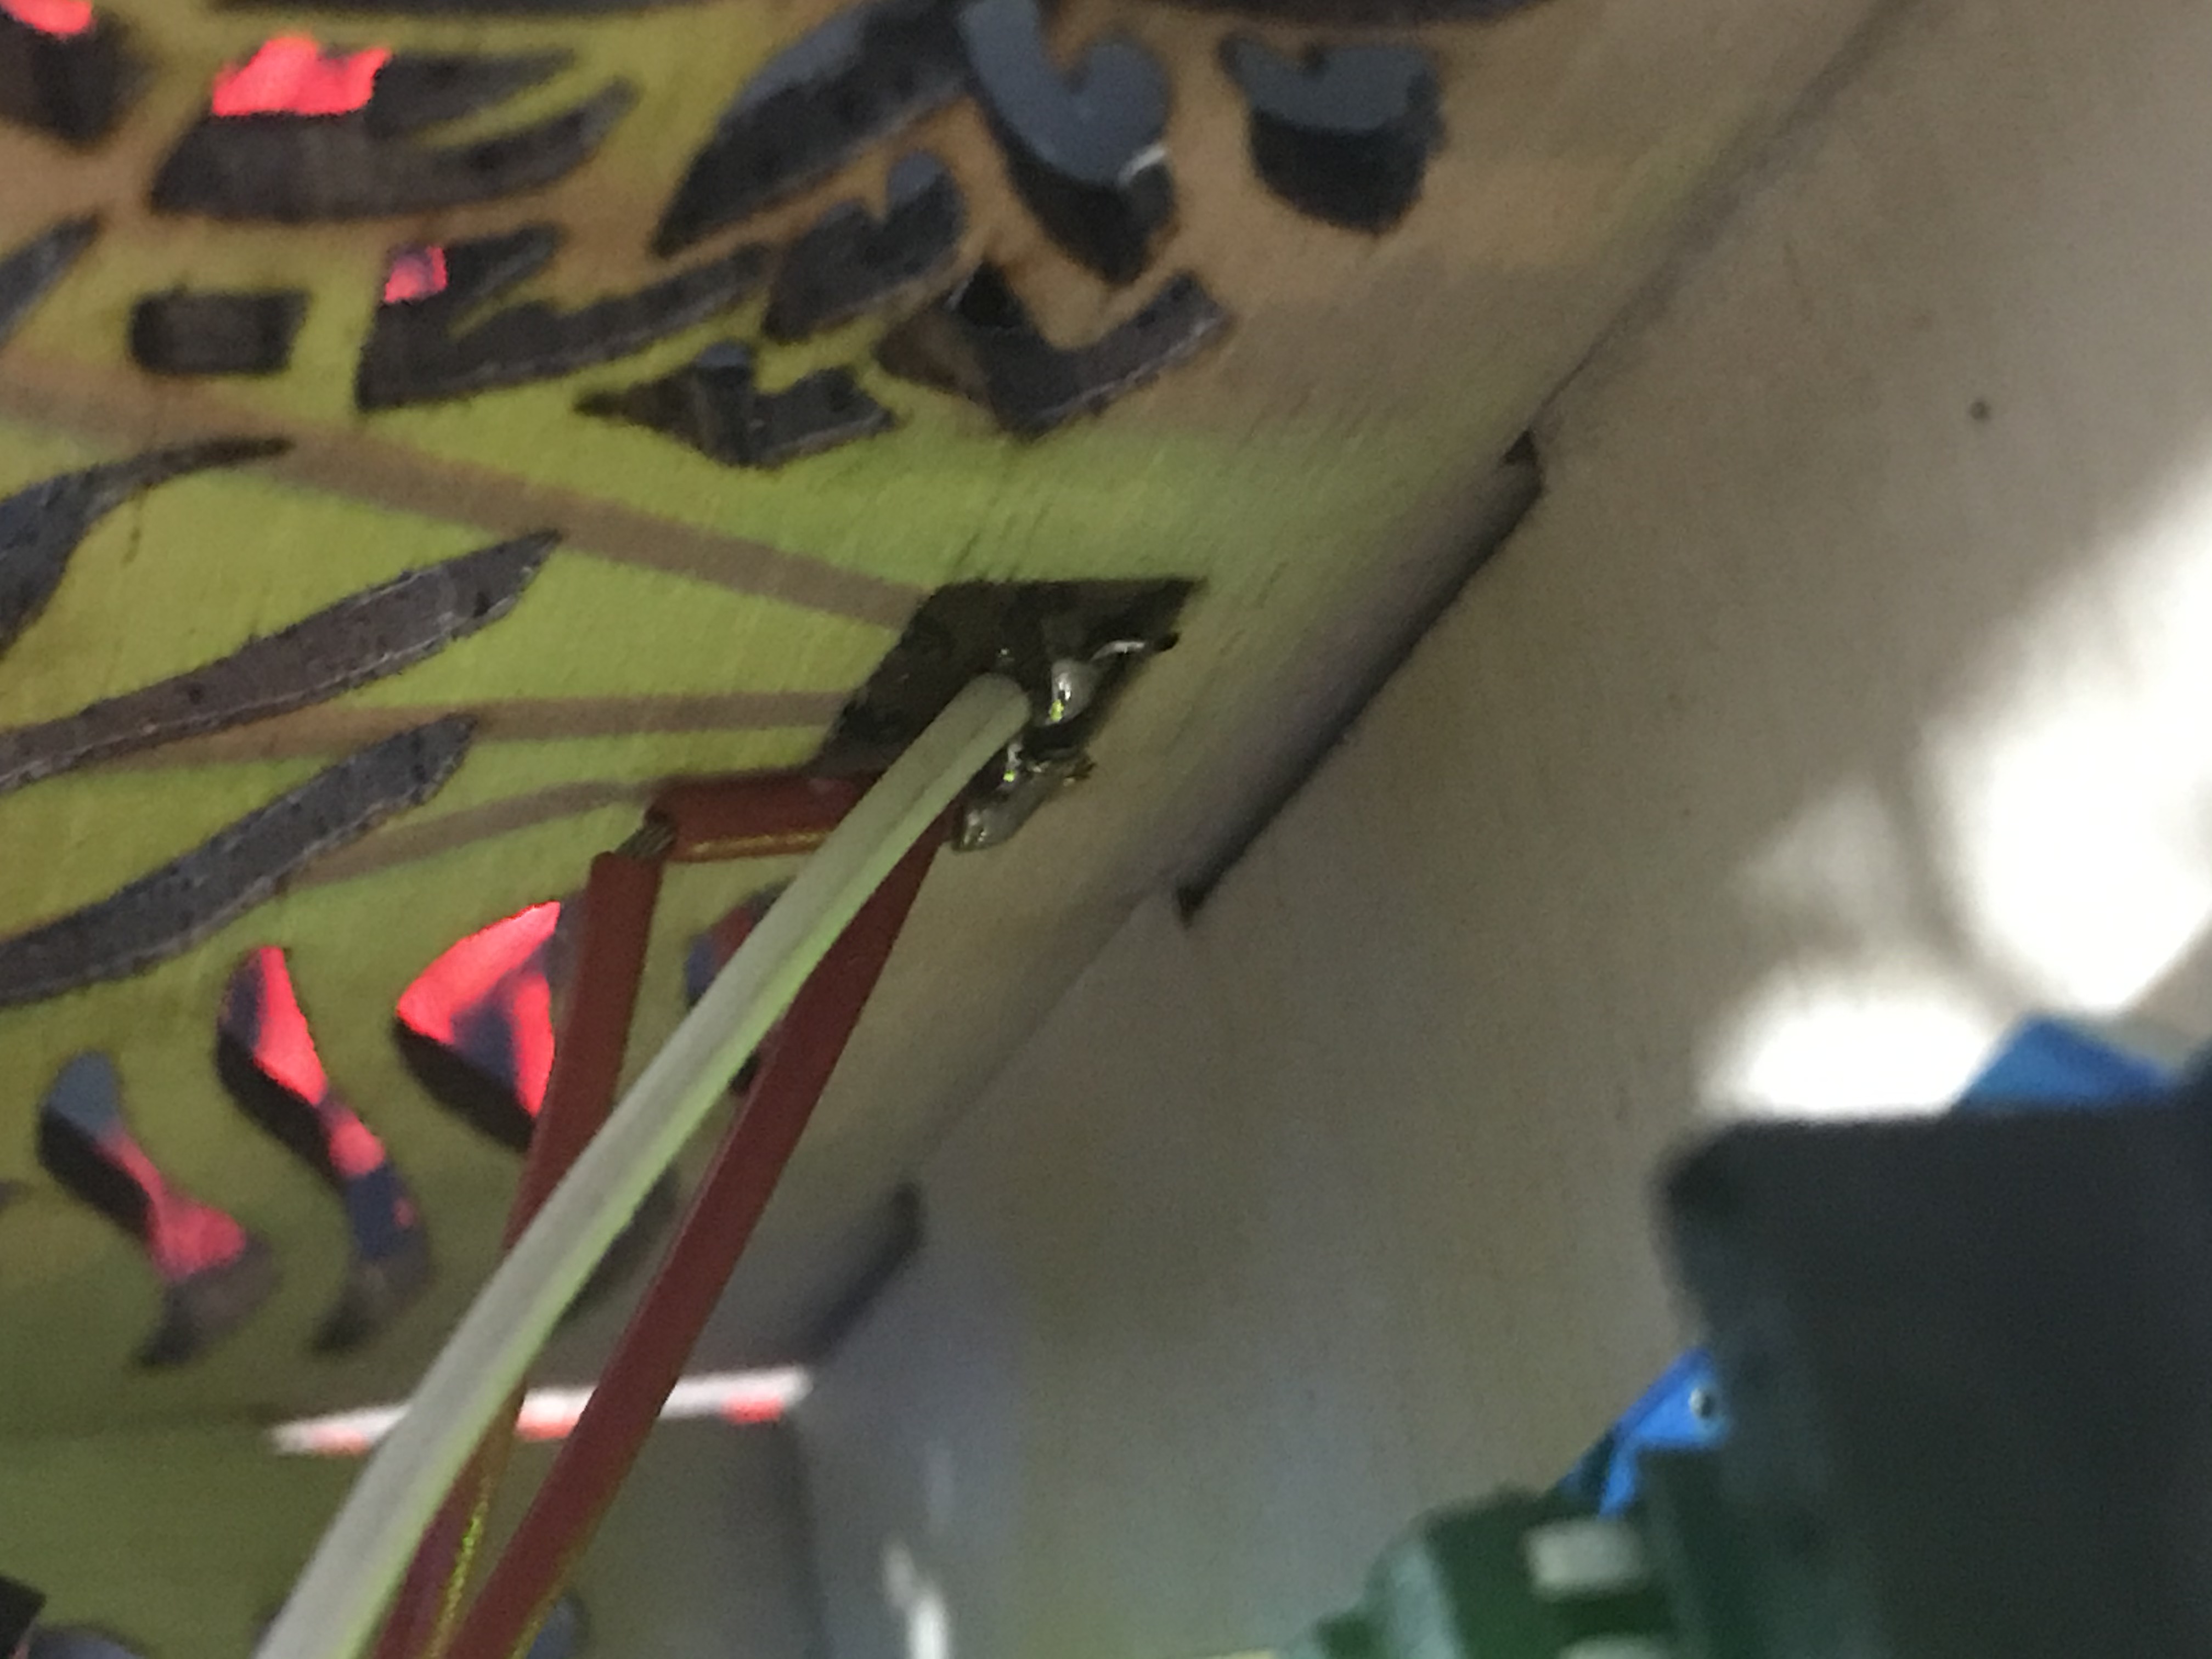
Hero Shot
The combination of RGB light colour and colour material of the crystal. After testing out the RGB light, I realised there is a moment where the light is not visble or straight out disappear. I found out its the blue light not appearing. So I went to Google and learned that orange tinted objects will block blue light due to the different wavelength of light found in colours.
Reflection and things I have learned
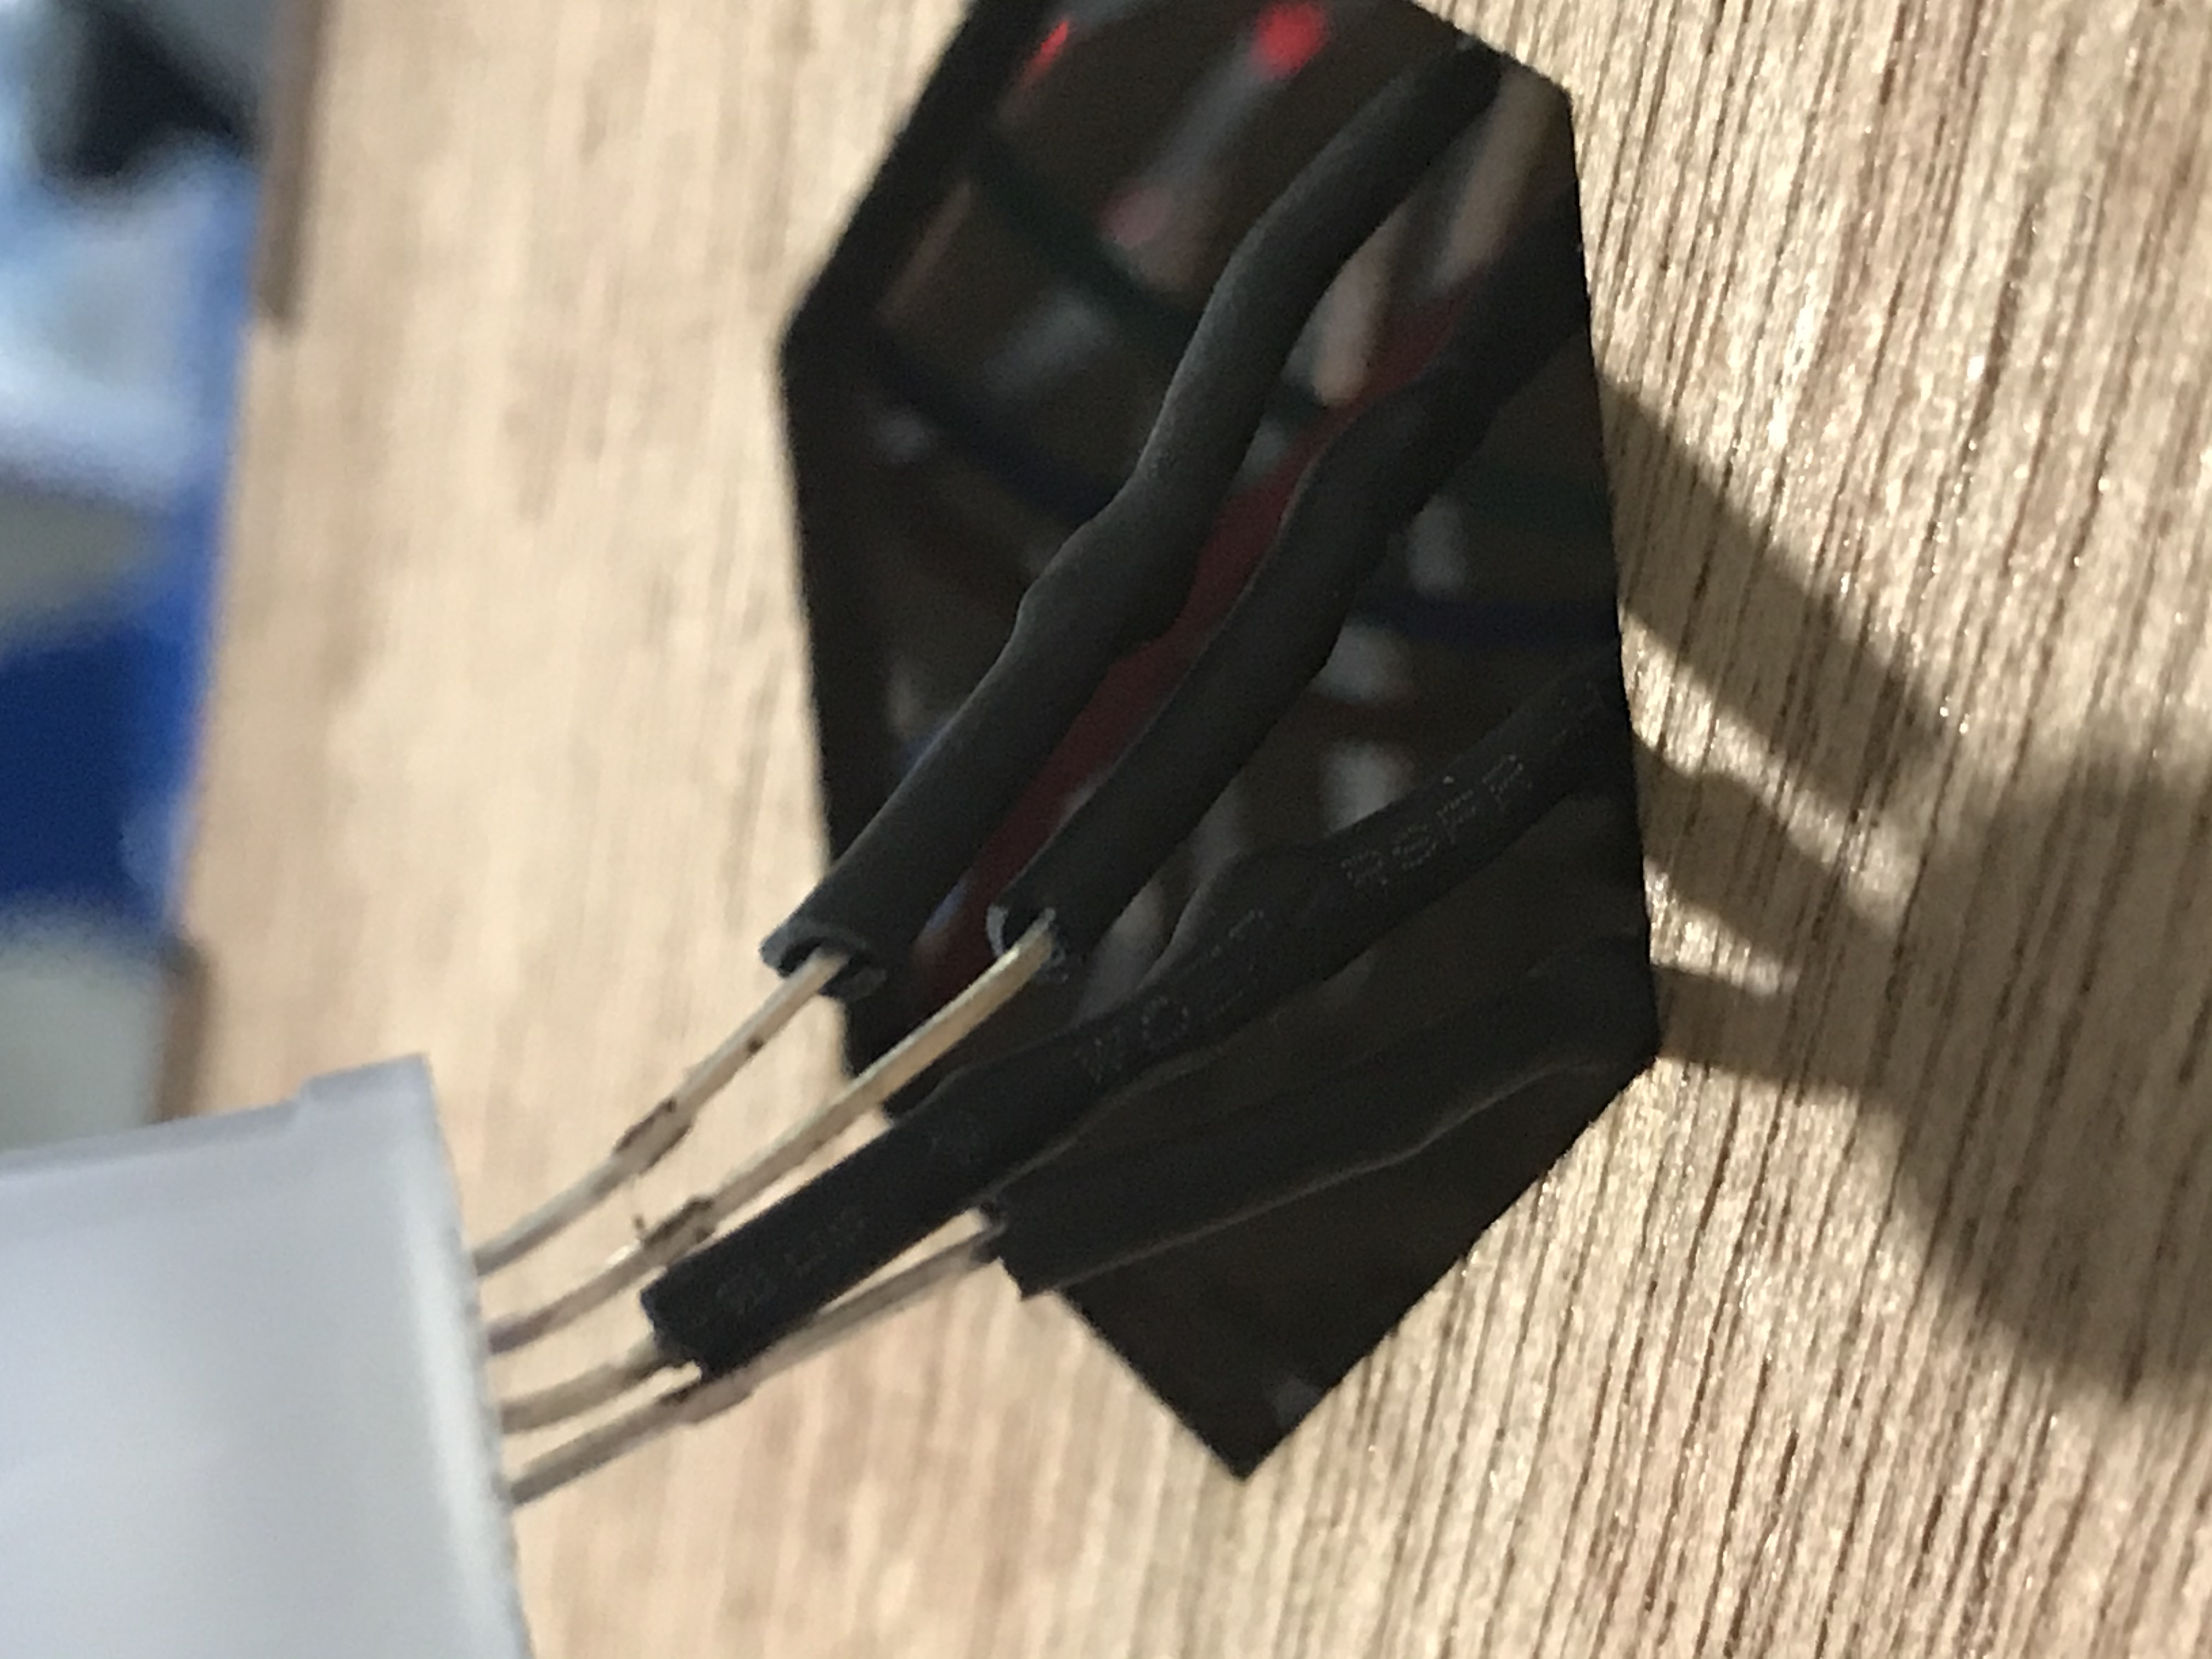
I learned it the hard way that bad soldering can change the outcome of the wiring whether it will work or not. Previously when I tried to put in either 5V or Ground wire, it seems to not work, the Arduino UNO's light will turn off on its own. Turns out I accidentally soldered the 5V and Grounded wire together on the slide switch, so I had to resolder it.
Another problem I faced is also not properly putting the rubber insulation tube on the wire. Some parts of the wire were exposed which may lead to short circuit if they touch each other. Thus, I also had to reapply the rubber insulation tube.
Working through this project, I learned the importance of planning. Planning well can save time and prevent headache. Previously I tried to 3D print the base but it failed. After receiving advice, I realised it is better to laser cut it since it will be quite big.
Measurement itself is also important and part of the planning stage. I'm quite thankful for the failed 3D print box because I tried to put in my Arduino UNO with the wiring and I realised it is actually not tall enough. Because of this, I'm able to make sure my current laser cut plywood base is able to fit in everything.
Final video
Group project
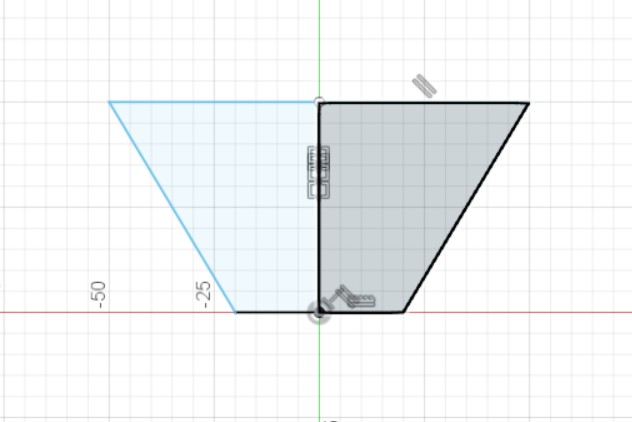
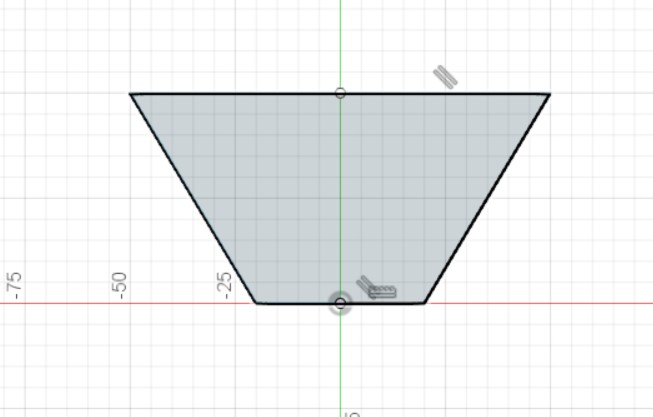
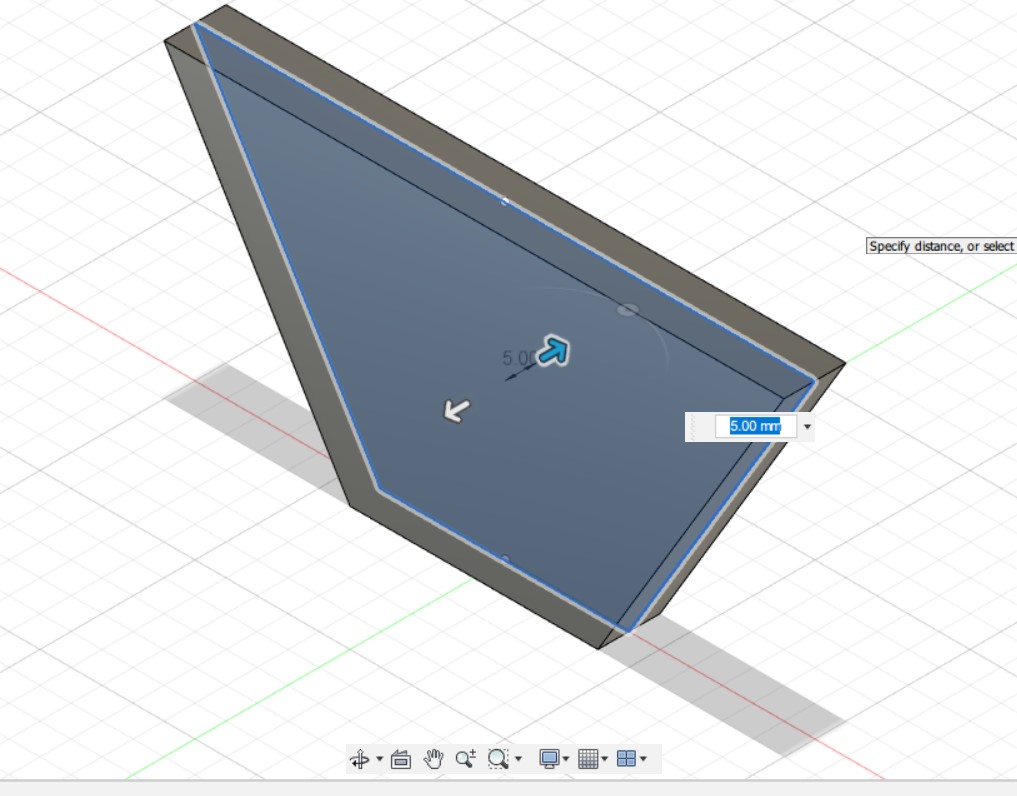
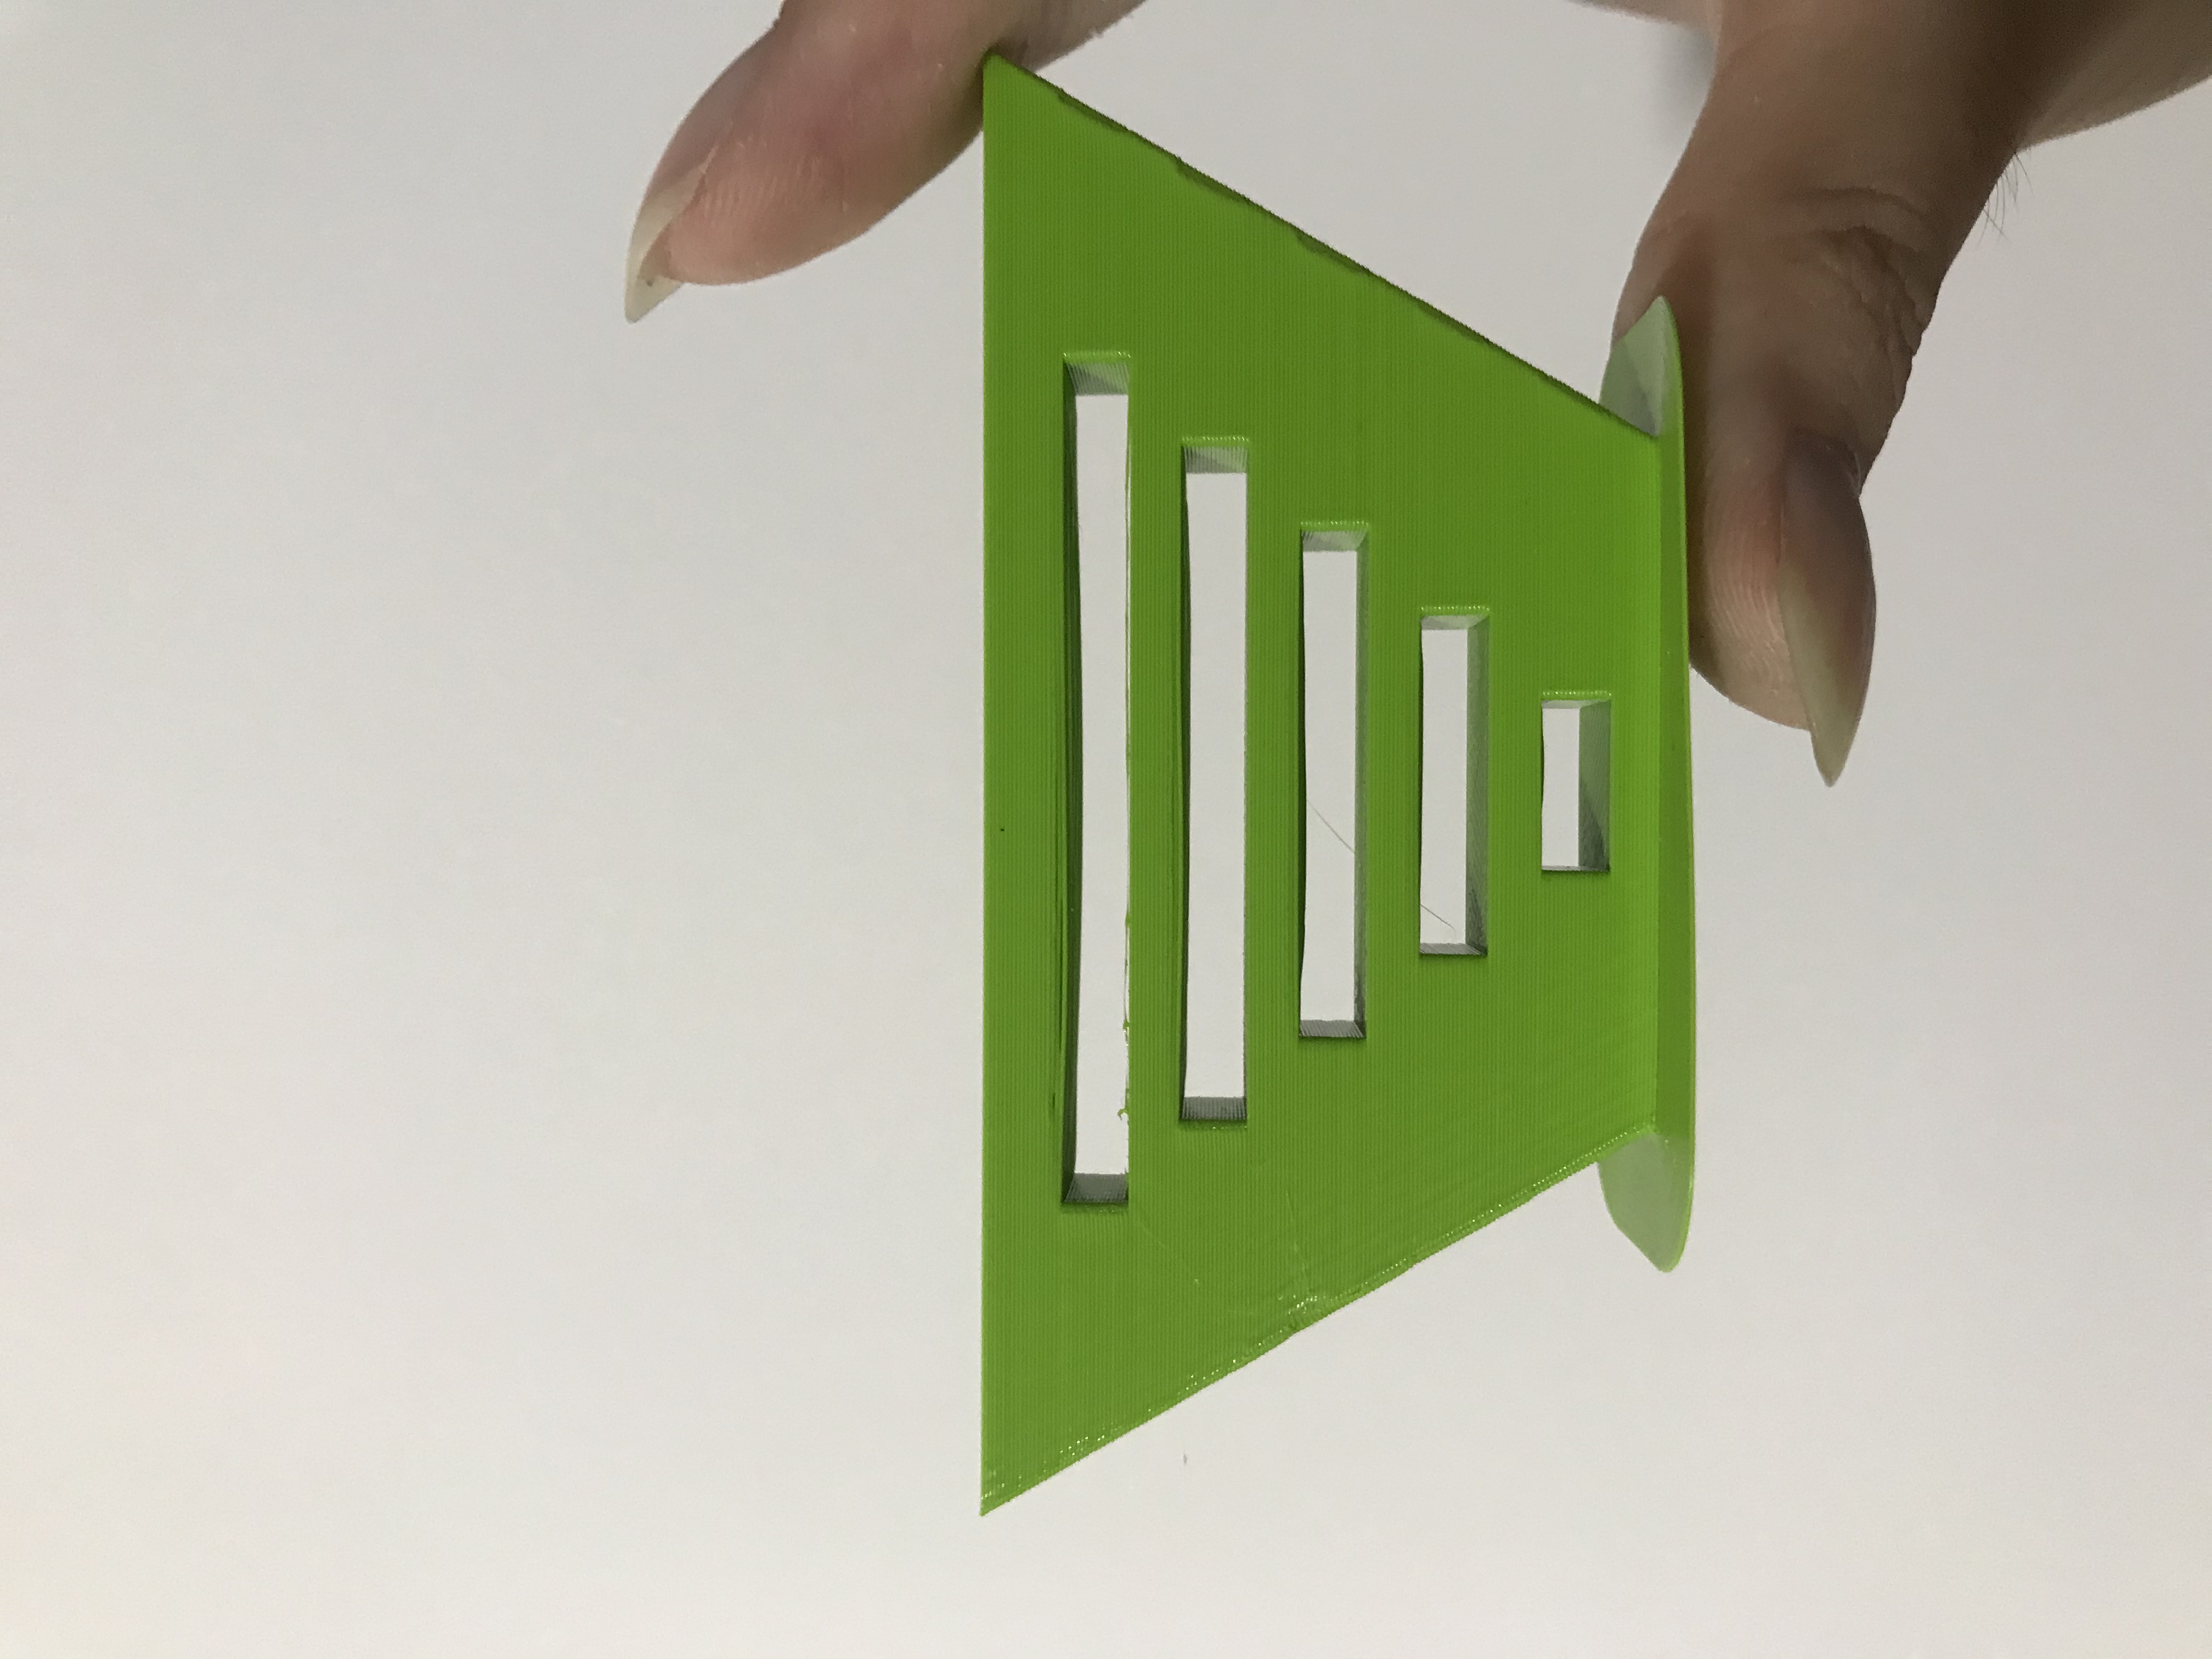
For group project, each of us are to test the properties of 3D printing. I'm in charge of doing bridging. Bridging is the horizontal gap between 2 points, the longer it is, the unstable it will become as there is nothing to support it. I sketched out the trapezium shape then used mirror. Then I extruded the model and made holes inbetween starting from the smallest bridging at the bottom to the largest bridging at the top.
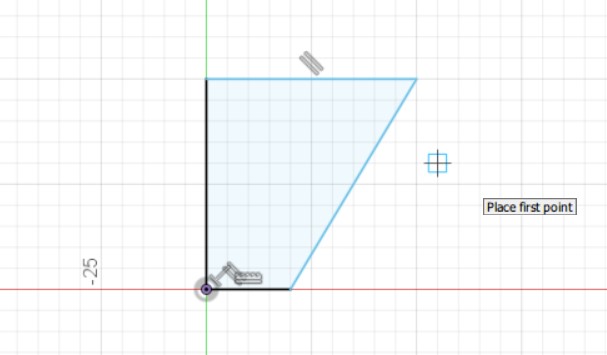
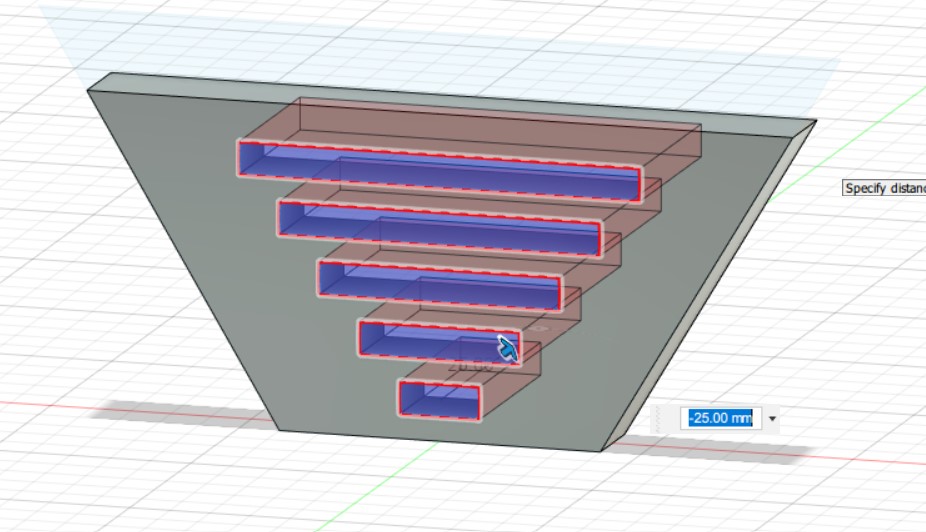
Briding.stl